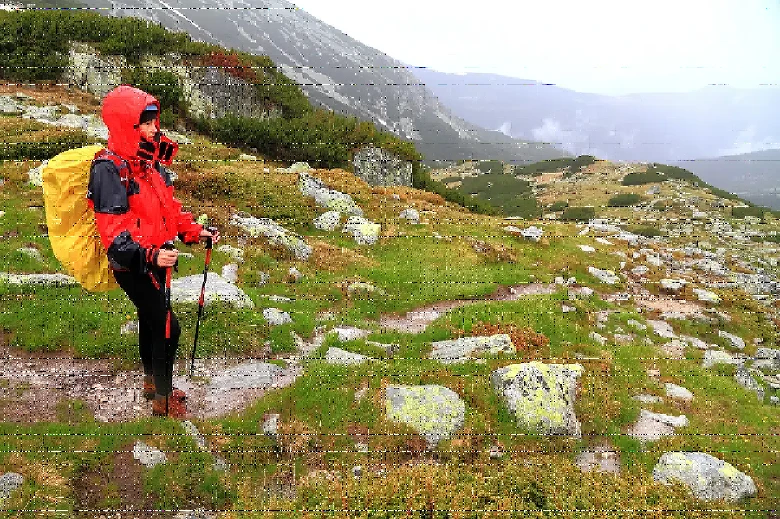
Good gear, packed well, makes your walk safer and more enjoyable. You don't need the fanciest gear; you just need gear appropriate for the conditions and your plan. It is also important to think about what you don't take - the lighter your pack, the more you will enjoy walking. If your gear can have multiple purposes, it can help save weight (e.g. clothes that can be used as a pillow, or a phone that is also a camera and GPS).
Do consider the consequences of an item suffering catastrophic failures such as damage, loss or flat batteries. For example, if a mobile phone is used for communication, photography and navigation, then all these features are lost if the phone fails. Backups may be possible in a group where two or more people carry critical items.
Following is a gear list that will work for most temperate climate overnight walks. Use the checkboxes to make sure you pack it all. If you want further information on any item, tap the title to unfold more info and suggestions. The following list applies to many multi-day bushwalks, use it for your practice walks to help ensure it works for you.
Keep you pack as light as you can. Choose lightweight gear and carry only what you need.
The tent, sleeping bag, clothing and food tend to be the items where most people can reduce weight significantly with a bit of planning.
As a good rule of thumb, make sure your pack is less than than a third of your body weight. This should be achievable. For kids this generally means there pack weight in kilograms does not exceed their age, ie typically a 10-year-old should not exceed 10kg pack.
Just because you can carry more weight does not mean you should. The lighter the pack, the more agile you will be on track, the easier the hills will be and the less prone to injury you will be.
Including water (2 litres is 2 kilograms), food and all your gear, aim to have your pack around 16 kilograms or less. Most people walk with a pack between 15-18 kilograms. As you get more skilled at bushwalking and also willing to spend more money you can get your pack weight down much more.
Carrying
A good quality, comfortable 40-50 litre backpack, which has been well fitted, is essential. You will need to pack all your equipment and supplies inside. The more comfortable it feels, the more you will enjoy walking. I use an Aarn brand pack and find it works great for me. Try a few packs and see what suits you best, if you have bushwalking friends ask to borrow gear to try out with a full load.
Work to get all your items inside your pack. If items need to be attached to the outside of your pack then re-consider your gear and re-pack. If you must attach gear to the outside, make sure it is secure and can cope with abrasion and water. Tent poles have been snagged and left behind in trees, sleeping mats shredded (leaving bits of foam through the bush) and whole tents lost. Don't rush packing, if it does not fit inside, pack again - big items first and fill the gaps with smaller and squashable items. Leave things you need accessible so you don't need to unpack until camp.
Backpacks are not waterproof and keeping your gear dry is essential. Use a few large heavy-duty garbage bags inside your pack, or buy a series of waterproof sacks. Some people like using waterproof stuff sacks to organise gear in their pack. Pay special attention to packing your sleeping bag and clothing to ensure they stay dry, with an extra bag to be sure. Also, never pack water bottles or other liquids (water or fuel) inside your waterproofing; if they leak inside your waterproofing everything will be soaked.
Only half fill a bag allowing you plenty of room to cinch the neck of the bag, squeeze all the air out and twist the bag closed, tucking the neck firmly away.
The idea of a raincoat for your pack might seem unusual but I recommend them. These are typically a waterproof nylon 'pillowcase' that has elastic or drawstring around a wide opening. Loop the cover over your pack (and tie it on) so that your harness is all that shows.
These are helpful for two main reasons.
The material of most packs will absorb water as it rains; this increases the weight you are carrying and increase the chance of your gear getting wet. Avoiding the extra weight of the absorbed water will often make up for the weight of the rain covers, it's also much nicer dealing with a drier pack in camp.
The cover also helps act as an extra layer to help secure your pack from animals looking for food. They are not designed for this, but will careful fitting they can help.
Shelter and Sleeping
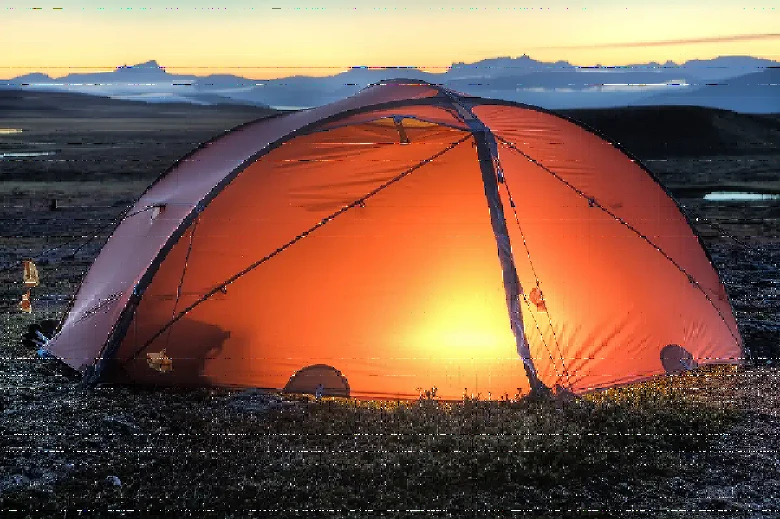
A good lightweight tent is a really good shelter for most overnight walks. There are other options (like Hammocks) but keep it simple especially when getting started. Sharing a tent with a friend is a great way to save weight. Most modern lightweight tents start at about 1.5kg, then add about 600 grams for each extra person it can home.
Practise setting up your tent a handful of times before using it. The end of the day you are tired, you don't want to be trying to work this out for the first time if you are tired & wet.
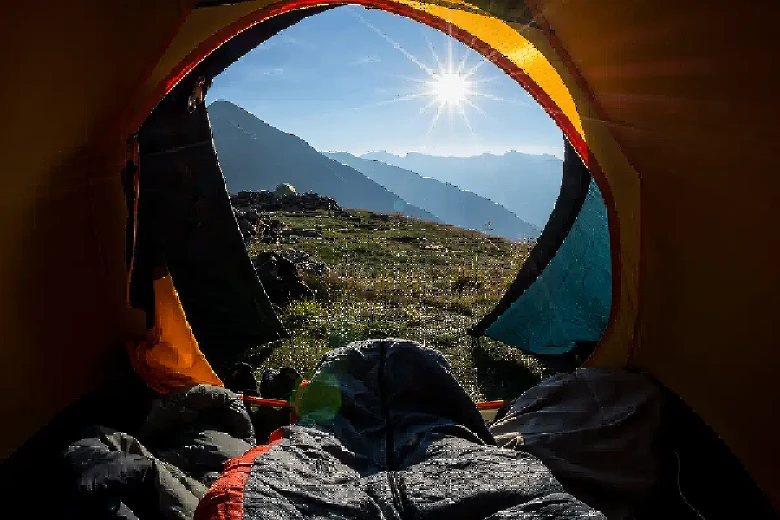
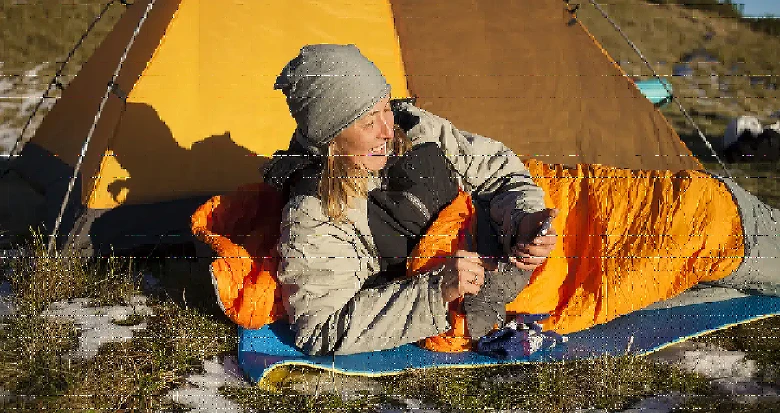
You will need a warm sleeping bag generally with a minimum temperature rating of -5 ˚C depending on the time you are walking. Down sleeping bags are the warmest for the weight and size, but they also tend to be more expensive than synthetic-fill bags and must be kept completely dry. Sleeping bags come in a big range of sizes and weights, so choose wisely and enjoy snuggling up in it each night.
Tapered sleeping bags weigh less, and are warmer than rectangular but not as roomy. A hood makes the bag warmer and is essential.
PRO TIP: Line you sleeping bag stuff sack with a large thick plastic bag and stuff your sleeping bag inside the plastic bag and stuff sack. Once stuffed, squeeze out some extra air then twist the plastic bag closed. Place the twisted bit inside the stuff sack and cinch it closed. Then pack your sleeping bag inside the waterproof liner of your pack, maximising your chance of a dry sleeping bag, even if your pack ends up in the lake.
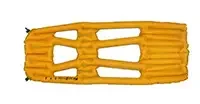
You will need a sleeping mat (pad) there are many types to choose from but look for small and lightweight options which won't compromise a good night sleep.
A sleeping mat helps in two main ways. It provides thermal insulation, to minimise the heat you lose to the ground. It also provides cushioning, helping your body relax in more comfort than sleeping on a tent floor or wooden bunk. I prefer sleeping on an inflatable sleeping mat.
The inner-sheet will help you keep your sleeping bag cleaner and add to the warmth. Although not technically an essential bit of gear, I highly recommend one to improve the lifespan of your sleeping bag. I find I get a more comfortable night's sleep.
PRO TIP: on warmer nights, I tend to unzip my sleeping bag most of the way and sleep in my inner sheet, using my sleeping bag as a quilt. Leave the zipper done up a bit so if it gets cold during the night you can zip up the bag without too much hassle.

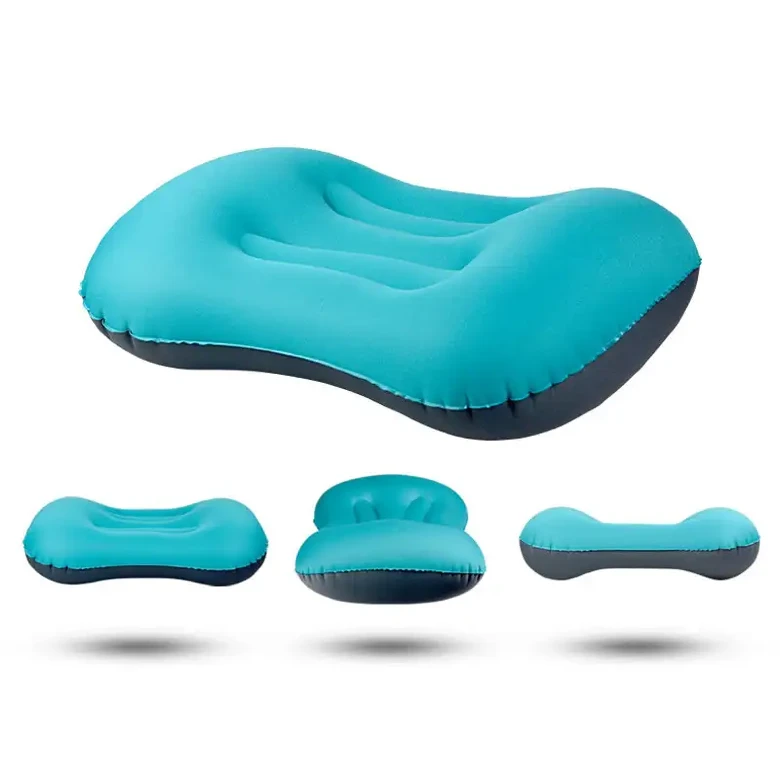
Your normal pillow from home is too heavy and bulky to carry, but there are alternatives. Some people use a rolled-up jumper or clothes inside a stuff sack, t-shirt or pillowcase. These DIY pillows work for many people, but are lumpy and change shape overnight.
If you're someone who gets a sore neck or values a good pillow then consider carrying a lightweight inflatable pillow.
PRO TIP: for many years I put clothes in the t-shirt and it worked fine, then i tried an inflatable pillow. Now I almost always pack a pillow, it is a lovely luxury that helps me sleep better.
Campsites can get noisy at night. Some walkers snore or have noisy sleeping mats. You might even get creatures scurrying around. Sometimes you might also come across a rowdy group (don't be them!). Earplugs can help get a better night's sleep. Grab some small lightweight ones from a chemist.
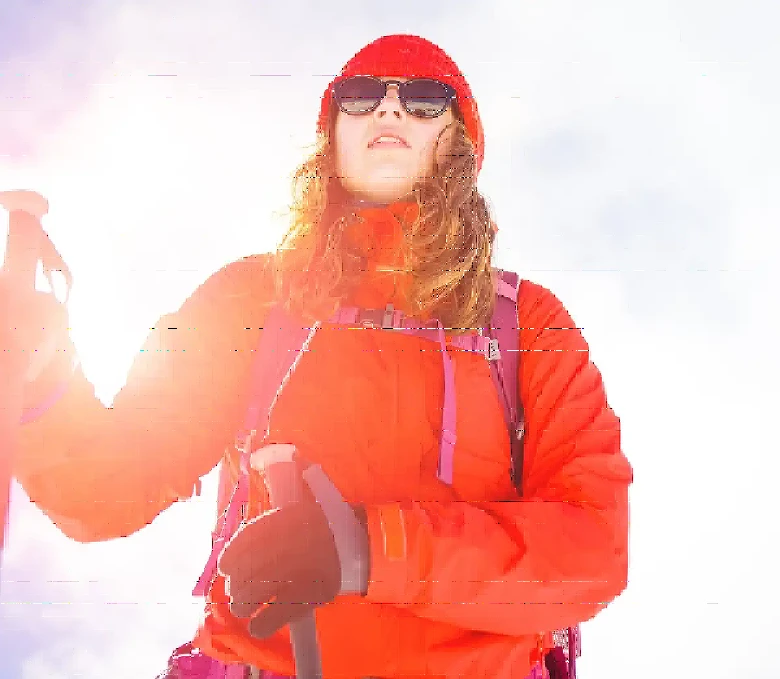
What to wear on track
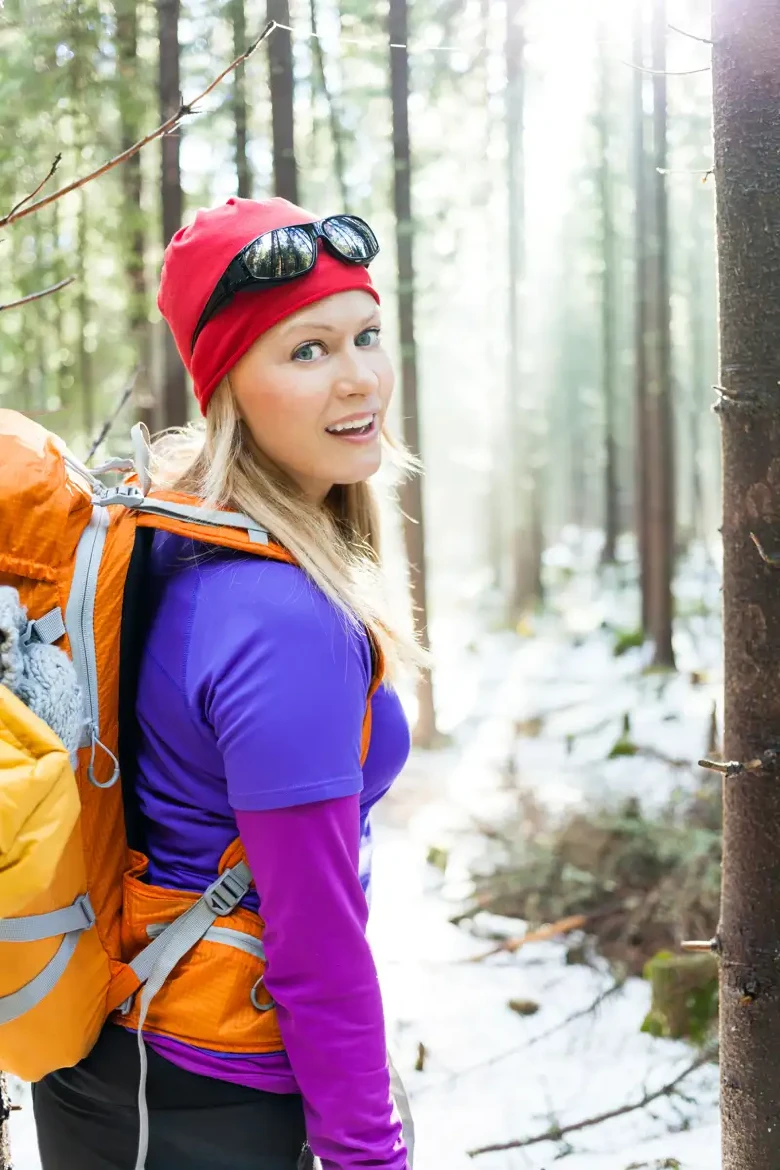
The weather may not be hot, but UV light is strong in Australia. A hat is a good part of your overall sun protection.
PRO TIP: A large flap at the sides and back keeps the sun off your neck/ears. You can use safety pins to attach a handkerchief to the sides and back of a cap.
PRO TIP: A hat with a good peak is also helpful in light rain, to keep some of the water off your face (especially useful if you wear glasses). A bulldog clip can also attach your cap to the peak of your rain jacket hood, keeping you extra dry.
Sunglasses protect your eyes from the strong UV light and from some items flicking at your face (you can get sunglasses also rated for this kind of protection). They are also helpful on windy days to help protect your eye from drying out and from dust particles. I like polarised sunglasses that wrap around the side (yes they look ugly); they are comfortable and provide good protection.
A quick-dry shirt with a collar and long sleeves (short sleeve is okay too) provides good sun protection, is lightweight and works as part of a layering system to keep you warm in colder weather. Don't bring cotton shirts of any kind. If they get wet, they do not insulate but instead make you colder very quickly. Merino wool is great (although expensive) and many synthetic fabrics work well (although get smellier more quickly).
One short sleeve and one long sleeve, with collar, is a good mix if you are carrying two. One walking shirt is usually enough (and one camp shirt).
There are many great options for what you wear on your legs so is not possible to make one recommendation. Let me give you some great options, and you choose what is best for you.
When choosing pants, think about the following:
1) Sun protection. Look at UPF of the material and total coverage.
2) How it performs when wet. How quickly does it dry? Does it restrict your movement?
3) Temperature regulation. Will it work well on a warm day? Will it be helpful as a layer on a cold, windy day? Will it still keep you warm if wet? Does it wick sweat away from your skin?
4) Durability. Will the material be okay when rubbing up against rocks and prickly brushes?
5) Stink factor. Materials that are anti-microbial are less smelly over time.
6) Comfort & style. At the end of the day they need to also feel comfortable to wear.
I tend to wear quick-drying shorts (with sunscreen) on warm days (even if raining). When cold or windy then I will wear thermal leggings with shorts over the top (stylish). But - I am a shorts kind of guy, so this does not work for everyone.
A popular choice are long stretchy loose-fitting pants (nylon with about 5% spandex), these tend to perform well on all the points above if you are comfortable with long pants).
Another choice that is growing in popularity are leggings (not cotton). Very popular for day walks, still comfortable for longer walks but some do get stinky after a few days.
There is one fixed rule: no cotton pants, especially not denim jeans. These are terrible once wet, take a very long time to dry (probably not for the rest of the trip), cause chafing and transfer body heat out in wet, cold conditions.
Got some pants and not sure? A pretty good test is to wet then wring dry your pants, put them on wet and go for a walk to see how they perform. Can you get them on and off easy enough? Do they still keep you warm? Can you walk comfortably in them?
I am a fan of merino undies. They are comfortable, wick away sweat and smell fresh as a daisy for days (okay, they stink less). Look at boxer briefs; these are form-fitting but longer than normal briefs, which can help prevent chafing. Some women, in particular, seem to prefer bikini brief type cuts (some guys and gals prefer g-string), so go with whatever works for you, but this is a good starting point. Ohh and watch out for seams; the hip belt on your pack will be squeezing you, so the lower profile seam the better.
If merino does not work for you, check out synthetic blends or quality bamboo fibre. Bamboo is slow to dry and can be cool when wet, so merino really is better.
Consider any continence needs when planning underwear. If you take pads or other continence aids, remember to pack enough snap-lock bags to contain the used products (they can't be placed in the toilets or buried as they do not decompose).
As for a bra, try a comfortable sports bra, they are generally well designed for comfort and with materials that cope well with activity.
Underwear is lightweight, so if you really want to carry a fresh pair for every day you can, but it is generally not needed - they can be rinsed and dried on track for longer walks.
Your feet will be up close and personal with the track, so spend a bit of time thinking about socks. If socks are too thick, your feet will get too hot and sweaty, and you'll get blisters. Too thin and you run the risk of causing blisters through rubbing. There is a big happy space in the middle, so don't stress too much -- just get some sock that works well for you.
Think about medium-thickness socks, nicely fitted, that use a blend of Merino Wool, Polyamide, Elastane (or other similar fibres). This blend is stretchy, fit well, wick sweat away and suit a range of temperatures.
It us usually worth carrying a spare pair of walking socks.
Good shoes or boots are one of the most important pieces of your gear.
Don't stress over the brand; find footwear that fit you well, are comfortable and lightweight. Waterproof boots (leather or synthetic) are helpful in rain and mud, but remember they are only waterproof up to their opening (if they are actually waterproof - many aren't), and then they become little buckets.
Many people walk in runners in places where there is no snow or deep mud. These are lightweight and breath well.
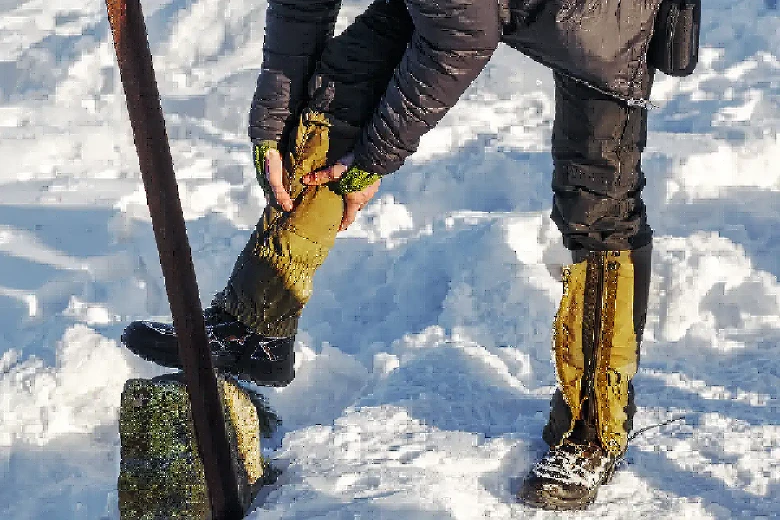
Gaiters protect your trousers, socks and legs from plants but also help keep rocks, rain, mud and snow out of your boots. You may not wear them every day, but can be handy things to have.
A buff (bufanda is Spanish for scarf) is simply a tube of material (such as merino wool). They vary greatly in thickness and length but primarily serve as a sock for your neck. If you like them (and my wife loves hers), they are versatile, lightweight and good for fine-tuning comfort. I think they are nifty.
By versatile I mean they can act as a scarf, headband, beanie, balaclava, hairband, wristband (for wiping sweat from your face) or even a small towel. They also fill the gap around the neck of a jacket to help keep more warm air in. They are useful for sun protection and also against the cold.
There are lots of styles, materials and lengths. We have found that medium weight merino wool works best. Size varies a bit, but look for something about 50cm long and 25cm wide when laid flat, and really stretchy.
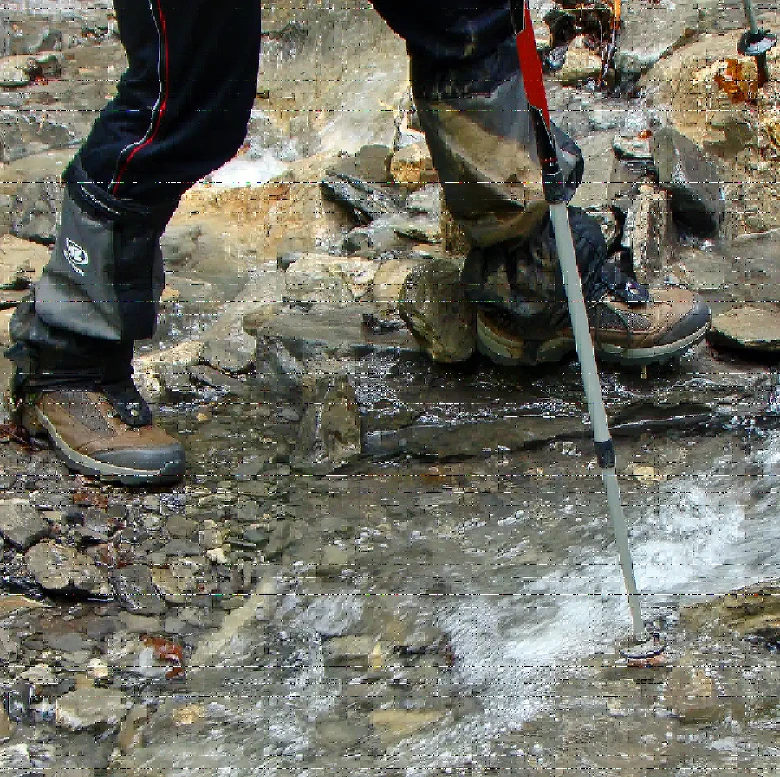
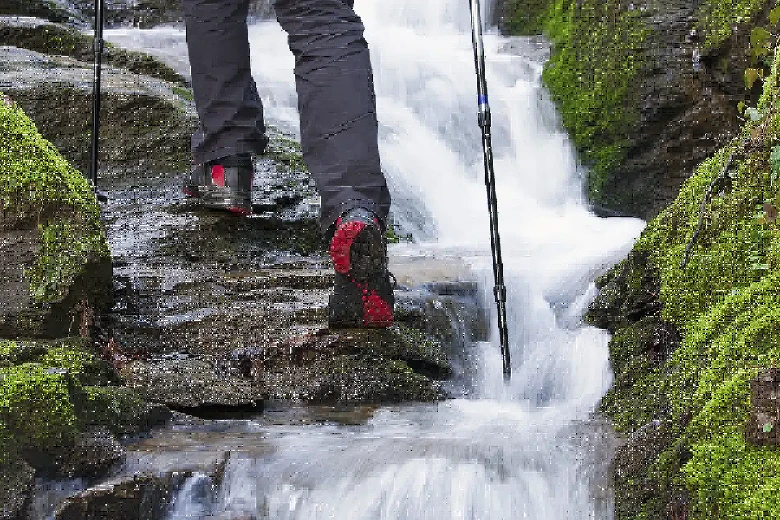
Trekking poles are one of those highly personal bits of gear. Most people either love them or loathe them. I have tried a bunch of them and want to like them, but I find them annoying. Still, I know many people who swear by them. They do take a bit of getting used to and do have their place.
Trekking poles are most useful on river crossings. They can also save weight by also acting as poles for some tents, or as a monopod for your camera.
If your knees or ankles are not very stable then trekking poles, used well, may provide extra stability. You need to train with them to avoid causing injury, as poles are just shifting weight from one part of your body to another.
I know many people love them and find them a great bit of gear, so if you're one of them, pack your poles.
As with your boots, pegs and other gear, make sure you wash the base of your trekking poles well before heading to the start of the track, to ensure you're not transferring any dirt-borne diseases.
Have near the top of pack & put on as conditions dictate
Layering is a great way to keep warm. It is far better to have several layers of warm but thinner clothes than just one thick layer. You can vary your temperature by adding or removing layers. I suggest carrying a few pairs of thermal tops and bottoms; save one pair for camp and one for walking on colder days. Then you are prepared for freezing weather with an extra layer.
A top with a 'turtle neck' may be better if you feel the cold.
When planning to walk in colder weather gloves protect your hands from cold. In temperatures just above zero then a thinner pair of polypropylene gloves will be snuggly on those cool, windy days. If you get caught out, a pair of socks will keep your hands warm, though with less dexterity in your fingers - especially when wet, and a bit goofy looking.
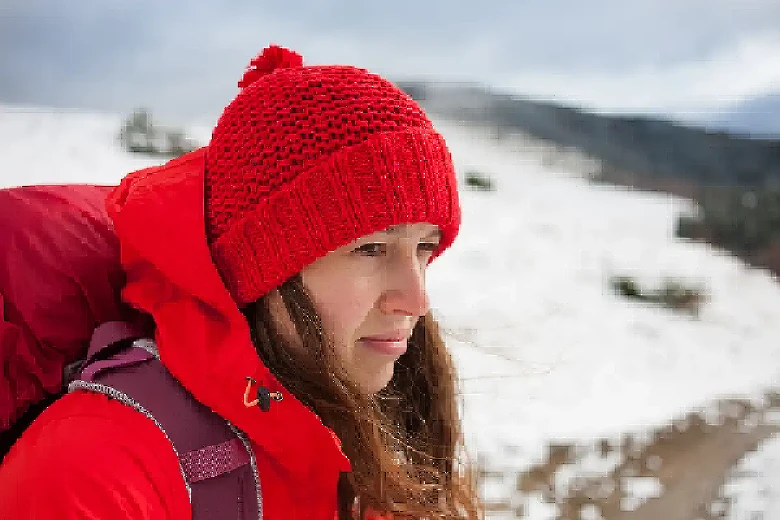
A beanie will be especially handy during the night when your head is the only part of your body not protected by a sleeping bag, and of course, during those cold days. A good quality buff is a versatile substitute for a beanie. I prefer thicker merino wool or synthetic fleece material.
If you feel the cold more then a balaclava might be preferred. A thin balaclava and a beanie (or buff) is going to be more versatile.
Bushwalking often means walking in the rain. You may get lots of sunny days, or it might rain the whole trip. Rain is not 'bad' weather; walking in the rain can be enjoyable. A good quality rain jacket with a waterproof hood makes all the difference. Keeping your torso dry and warm helps protect you from hypothermia, but also allows you to enjoy walking in the rain.
Over-trousers are a rain jacket for you legs. Some people love them, some don't. They are especially helpful when walking in snow or cold driving rain. If you are someone who feels the cold then you will love you over-trousers on cold wet days.
Camping and extra clothes
Keep these clothes dry and fresh for comfortable evenings. If your walking clothes get wet, change back into the wet clothes when you are about to start walking so you'll always have a dry set in your pack for the evenings.
Temperatures can feel much colder when exposed to wind and humidity; wind chill is a big deal and can cool your body down very quickly. Using a rain jacket to protect your from the wind will significantly improve the effectiveness of a warm jacket.
As a general rule, it is better to carry and use 2-3 thinner layers (such as thermal tops) than just one top, but there is something more snuggly about a nice warm jumper.
A lighter weight "puffy" down jacket is super snuggly and warm, but down jackets don't work if wet or compressed (eg by a rain jacket).
A 'fleece' jacket is a great option, it is snuggly but still works if it gets wet and also works under a rain jacket if you have a cold and windy day on track.
(Don't pack a standard downhill skiing jacket, they are generally not very waterproof and are slow to dry.)
I like to save a comfy layer of clothes to wear each night. These are always dry, warm and not too smelly. These will double as an extra layer of warms if the weather turns colder than expected while walking.
A merino wool and other warmer t-shirt is perfect.
A pair of thicker thermal pants or 'fleece' pants are really comfortable for lazing around the campsite on those chilly nights.
If you are a cold sleeper you can also wear these in your sleeping bag for a bit of extra warmth.
If you are not one who feels the cold then a pair of thermal leggings and shorts work well.
What ever is lightweight and going to be comfortable. I wear boxer shorts.
It is just lovely to be able to put a warm, dry, loose fitting pair of thick socks after a days walking.
You can wear them with camp shoes or just around the sleeping area. If you get cold feet in your sleeping bag then they can help, but do make sure they are loose fitting and dry before going into your sleeping bag.
It is a nice feeling to take off your hiking boots after a long day and relax your feet. Carry some lightweight shoes or sandals for use around camp. Lightweight camp shoes are a great way to look after your feet by letting them dry out and breath. They also allow you to wander around the campsite and to the toilet with less risk than bare feet. It is essential to look after your feet as they carry you along this journey. Check out the simple swimming-type slippers with rubber soles and flexible material on top as a good option.
My personal favourites are Skinners but they are not cheap. Crocks with socks is a good and popular option.
If there is ann opportunity for swimming then swimmers may be a helpful addition. I try to swim whenever I can, it is a bit of fun and very refreshing.
Some people will take a dip in their underwear and it does not seem to bother people on track, but just be mindful of those around you.
A small lightweight towel is very handy and I carry one on every walk. I use a microfibre tea towel that I bought from the supermarket. I can't wrap it around me, but it drys me off well.
A towel is not just for a swim. You can wet one corner and use it to wash yourself down after a day walking. Dry your hair if it has been raining (once in camp). Wring out wet clothes inside the towel to dry your clothes out extra quickly (repeat the process, wringing out your towel in between, to get your clothes surprisingly dry). Wipe down any condensation or water from your tent. And so much more.
Personal hygiene
Carry just what you need, like toothbrush & paste. Keep everything small and light. You don't need shampoo/conditioner so leave these at home to protect the environment. You don't need to shave either. You don't need deodorant, but if you take some, use low scented as the perfume becomes very noticeable (maybe even offensive) to other walkers.
Toilet paper is always handy. Carry your toilet paper in a snap-lock bag to keep it dry and to avoid unravelling. You need to bring your own paper for the toilets and also in case nature calls while walking. If you are not at a toilet, either bury the paper or preferably carry it (in a plastic bag) and empty at the next toilet.
How much paper do you need? Run an experiment at home, use toilet paper from a roll and see how much you use. Carry an extra 50% in case you get a tummy upset. Generally, half a roll per person will be enough if you are somewhat conservative.
PRO TIP: Encourage each adult in your group to carry their own toilet paper, rather than sharing. This can improve group hygiene, better conserve paper and avoid having to track down the location of the roll each evening.
Do not underestimate the value of this little bottle. Regularly washing your hands with an alcohol-based hand sanitising gel is your best bet to keeping clear of tummy bugs on track. Unlike soap, you don't need water, and it is better for the local environment. Follow the instructions; Squirt a bit on your hand and rub your hands for a time. Clean under your fingernails and between your fingers as well. Use it every time before eating and after visiting the toilet.
A small (50 mL) flip-top bottle from your supermarket or chemist is perfect.
Pro Tip: Encourage everyone in your group to carry their own one in their pocket at camp, and encourage them to use it. Also, have an extra bottle with your toilet paper.
A comb might be handy, but if you have long hair, braiding before the trip is a good idea. Personally I don't bother with a comb, I run my fingers through my hair when swimming to clear out debris and keep knots out -- but I don't have long hair.
If you have longer hair you may prefer to braid it at the start of the trip to help keep it under control.
Don't forget menstrual products as needed with some extra snap lock bags. Once used on track they should be double-bagged and carried out (they can't be placed in the toilets or buried as they do not decompose).
If walking with a pre-pubescent girl it would be worth carrying some extra pads just in case she develops her period whilst on track.
It is important to keep up good hygiene practices on track as you would at home.
If you wear glasses for walking then seriously consider packing some contact lens as backups.
Glasses can get broken or lost so a back up is a good idea. Also on rainy days, glasses may get spotty and fog up under your rain hood, so you may prefer wearing contacts on those days anyway. In your tent, think about a safe place to put your glasses where they will not be broken and where you can find them during the night (use a wall pocked or loop). Best to bring a lightweight protective case.
PRO TIP: If you are wearing glasses, then wear a peaked cap under your rain jacket hood to keep your glass as dry as possible. Also, a small bulldog clip (from your stationary draw) is great to attach your cap to your rain hood.
Read more about glasses.
If you normally wear hearing aids then still consider wearing them on track. Some people prefer not to, and that is fine as well. They can be extra handy at camp or in case there is an emergency where easier communication will help.
Clean them and have fresh batteries before you start.
Hearing aids tend to not cope well with water, so check your manual or chat with your audiologist about using your specific hearing aids on track. Most hearing aids will want to be packed away when it is raining (and don't work well inside the hood of rain jacket anyway).
A lightweight umbrella might help if it is not too windy, if you are keen to keep using your hearing aids in the rain.
PRO TIP: Tents are very humid places, consider packing a small tub with desiccant to store you hearing aids overnight to help them dry out well.
Read more about hearing aids.
Health & Safety
You don't need to pack your whole wallet, save the weight. Do carry a few basics just in case. Your licence (or passport) for ID, Travel/ambulance insurance details, a credit card and some cash in a snap lock bag. Your plans may change; you may leave early or be evacuated for some reason, so having a few basics can help.
If you're taking any regular medications or medical aides, pack them as well as any testing systems you need. You might have other medication or supplements that you take from time to time, make sure they are all packed (such as for hayfever).
If you have medication for emergency use (e.g. if you have asthma, heart conditions, allergies) make sure that it is packed in an easy-to-access but secure part of your pack. Also, pack your Emergency Medical Action Plan and explain this to others in your group. People can be much more helpful if they have had a calm moment to think about what needs doing before an emergency arises. Laminating your action plan is a good way to ensure it can be used in wet conditions.
Meet with your doctor to talk about your plans to do a remote walk and talk about how to manage your health on track.
If you have portable testing equipment (such as blood sugar monitoring) please chat with your doctor about what happens if it fails (eg if it gets wet). You may want to pack a second backup test kit in a friend's bag if needed.
If any of your medication needs injections, you will need to carry your own sharps containers and skin cleaning swabs. Similar is true if you're using a catheter or any other medical equipment - you will need to carry it all out safely with you. There is no power or charging system at campsites. Wrapping your medicine in clothing and placing it deep in your pack will help keep it insulated and cooler on hot days. Make sure any medicine needed in an emergency is easily accessible, and your friends also know where it is and what to do with it.
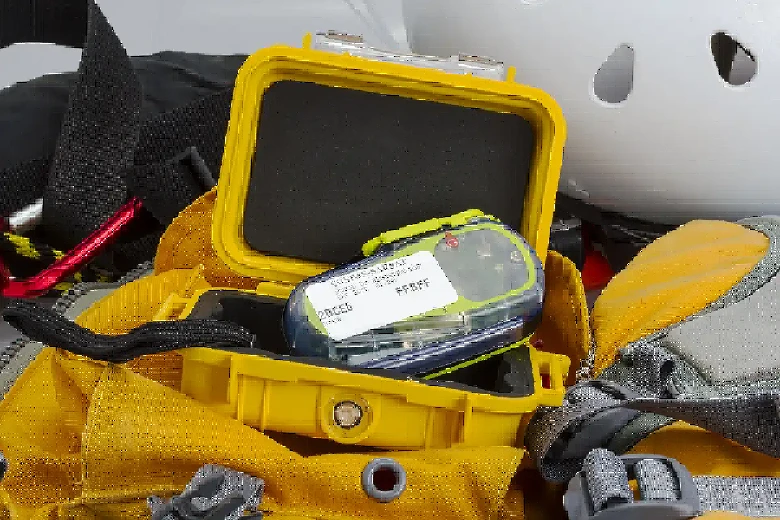
A Personal Locator Beacon (similar to an EPIRB) is a small device that sends a signal via satellite saying that there is a life-threatening emergency and gives your location. Since there is very little mobile phone coverage in the area, these devices are the most reliable way to call for help in a life-threatening emergency.
There are other satellite messaging systems that also work for sending (and receiving) general messages and for use in emergencies. With satellite systems that are not dedicated to emergencies, use be mindful of battery management and ease of use in an emergency.
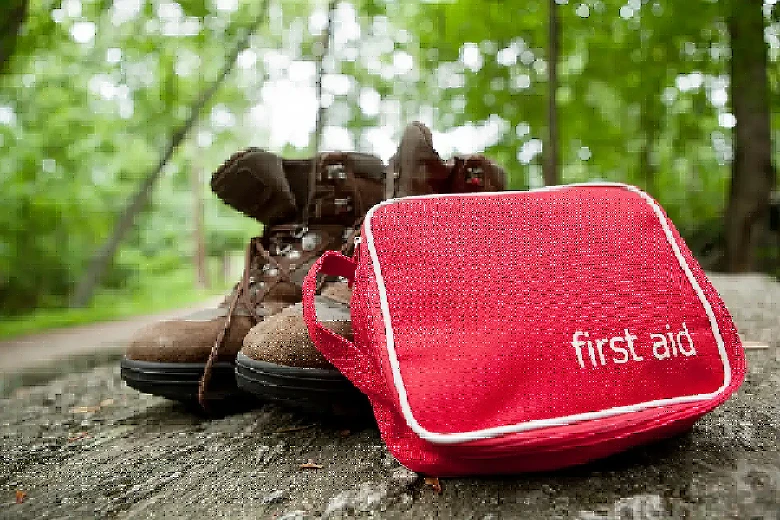
A first aid kit helps deal with injuries and illness along the way. Hopefully, you don't need it, but you will likely dip into it for usually minor issues such as blisters, insect bites, small cuts or headaches reducing the change of them becoming significant issues. In the event of a potentially life-threatening situation, they can help improve the outcome. You also need to know how to use the items in your first aid kit. First aid is mostly a skill that you learn; the equipment helps in the process. Update your first aid training before hitting the track.
Being prepared helps you better deal with emergencies if they do arise among your friends or other people you meet on the track. Carry a first aid kit for the group, but if you think you might split up for side trips and the like, then pack an extra so one is always available.
Stuff breaks - it just does. Boots fall apart, clothes rip, sleeping mats puncture, glasses frames get bent, zippers get stuck, stoves get clogged, tent get holes and so much more. Now if all this happens on one trip, then maybe you're doing something wrong, but even with good preparation some bit of gear still may fail.
Before you pack, carefully check all your gear for wear or damage - repairing before leaving home is the best option.
If you have not worn your boots in a while, walk a solid 10 km on them before you leave (boots have a habit of losing their sole when being used after a year or more in storage).
What's in a repair kit?
* Spare batteries
* Repair or duct tape
* Cable ties (about 20 medium)
* Pocket knife (with scissors or small pliers)
* Nylon cord (5-10 m)
* Sewing repair kit with safety pins
* Tent pole repair sleeve (an aluminium tube that slides over the pole if it breaks)
* Mattress repair patch (bike tire repair kit works)
* Stove spare parts and seals (and any tools needed)
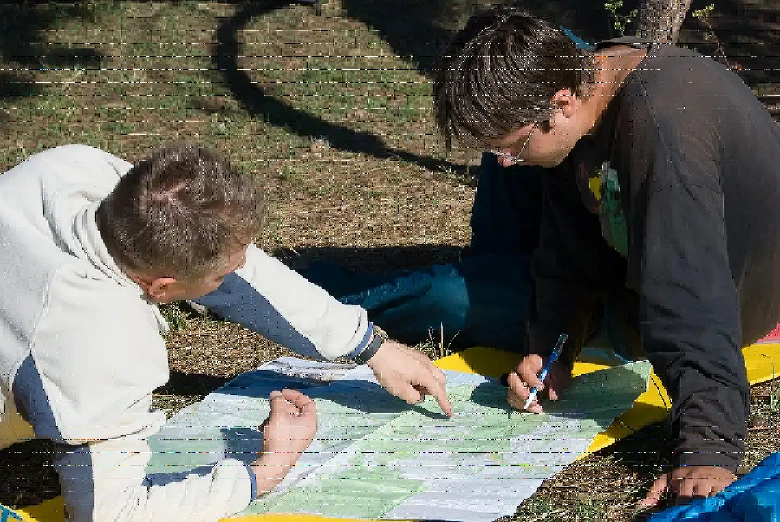
Lots of track are well marked, and you will find signs at most intersections. A map coving the whole walk and areas around helps you plan and adjust your trip as needed, anticipate what is coming up and deal with emergencies. The map in this app is perfect for day to day needs, but phones die and batteries run flat, so a paper map is also essential.
You might want to make copies of the map onto A4 paper that you can refer to during the day, and protect your main map from damage. A map case or large snap lock bags are good ways to protect your map on windy and wet days.
I rarely use a compass on track, but I will always carry one. They help you orientate yourself and your map. They are very helpful if you lose the track, loose sense of direction or the weather closes in. Using a map and compass takes some skill; take the time to learn how to read and use a topographic map and compass.

A small, lightweight knife can be convenient on track. You do not need a big hunting knife, just something small, sharp and safe to carry. Think about how you can use it for meal preparation and repairing gear. You will not be chopping down trees with it; small and lightweight is the go. (If you think you might need a big knife to be cutting down trees to build an emergency shelter, rethink the tent you are packing). I keep my pocket knife with my field repair kit, but sometimes it comes out at meal time.
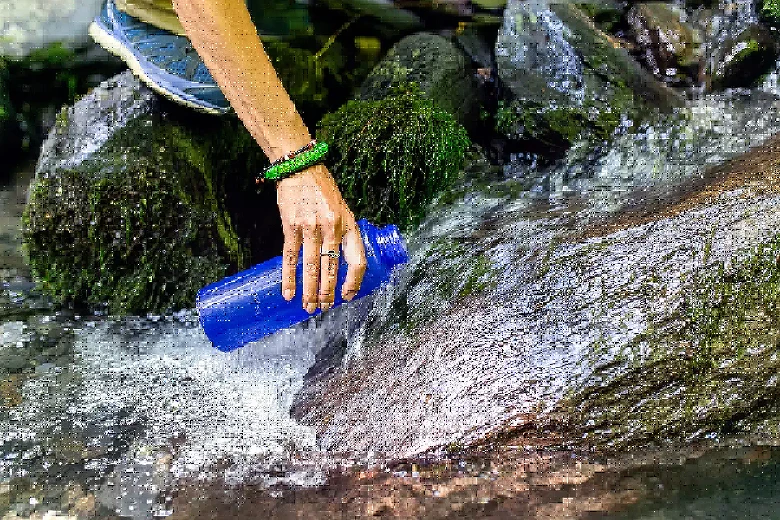
Walk into most camping stores and people are keen to sell you 'hydration systems'. If you want to use a bladder and hose system, then that is great, but realistically a few cheap water bottles will do the job. I re-use plastic soft drink bottles on track. They are strong, light-weight and super cheap.
No matter what water carrying system you use, always spread your water across more than one container. If one then fails, you don't lose all your water. It also helps you better track how much water you are drinking.
Top up water during the day. If you are well-hydrated and it is not too hot, you'll want to carry about 2L of water (be prepared to carry more on warmer days). If you are prepared to treat water along the way (there are plenty of creeks) then you don't need to carry much at all.
PRO TIP: I carry a 600ml sports drink bottle with a pop lid that I drink from. I also carry a couple of 1.25L soft drink bottles partially filled, that I use to fill up my main bottle during the day.
Treating water is also recommended when drinking from most tanks or creeks, especially near campsites. Many bugs that cause illness can build up in the water.
You can boil the water, filter it, chemically treat it or use UV light to deal with the bugs. Filtering and UV don't change the taste and are the quickest methods.

Sometimes nature may call while walking. Try to use the toilets where possible, but if you need to poop in the woods that is okay. To poo well, we dig a 15cm hole, do our business and bury it. The hole allows it to decompose quickly, reduce the risk of animals digging it up and stop other walkers from stepping in it (yuck). A small, lightweight trowel makes digging the whole much quicker and easier. A big snow peg will also do the job well.
Best practise is changing and some areas are becoming a 'poo tube' area - where we will use a dedicated tube or special bag for carrying out all human waste. That may sound like overkill, but it is a good way to protect that area and it is nowhere near as bad as it sounds. It is actually much easier than digging a hole in most places.
A whistle is a great way to draw attention from people around you if you need help. If you get separated from your group, lose the track, someone has a medical emergency - blow the whistle loudly three times to draw attention from people nearby. Generally, when people die on a bushwalk, it is after they become separated from the rest of their group. There is strength in numbers. Carry the whistle in your pack's belt pocket and use it. Better to laugh about an 'overreaction' then regret not calling for help earlier.
The best whistles are plastic (okay to use in cold weather), pealess (no little ball inside that can get stuck) and have two tones (two barrels, make it easier for people to know what direction the sound is coming from). They cost a few dollars and weigh a few grams, and might save a life.
A small LED head torch is convenient. Avoid a very bright one. You will use it is for cooking, getting around the campsite, walking to the toilet, organising gear etc. You are unlikely to be walking at night, but if you do have a long day, make sure the torch will work for that as well. You might use your torch for reading at night; a low power mode can be handy. Carry a set of spare batteries in a plastic bag.
PRO TIP: If your torch uses AA or AAA batteries, reverse one battery when you pack your torch, this way it can't switch on and run itself flat while in your pack. Flip the same battery each time, so you can easily flip it back even in the dark.
PRO TIP: If you have a clear-ish water bottle, shine your torch into the full water bottle for a DIY lantern with more diffused light. Shining the torch down from the top (with the lid removed) I think gives the nicest light.
PRO TIP: I lightly vac pack a set of AAA batteries into a cut-down bag. This keeps the batteries dry and together, and you know when they have been used. Since I don't tend to use a spare set of batteries, one pack will join me on many trips.
Knife, fork, spoon, mug and a plate/bowl. In a small group, you might be happy to eat straight from your cooking pot, saving some weight.
I use a metal (titanium) spoon/fork/knife combination for both cooking and eating. Plastic ones are cheaper and perfect for eating but can melt when cooking.
I like hot chocolate or soup at night or sometimes for lunch. A lightweight plastic (or double-wall metal) mug is handy, leaving my cooking pot free for cooking while I enjoy my drink.
Some people also like eating from a plastic bag or pouch. For breakfast, you can have muesli and powdered milk in a snap-lock bag, saving you from carrying a bowl. You can eat many freeze-dried meals straight from the bag. There is nothing wrong with this, but I prefer to take my time, see what I am eating and enjoy the food presentation.
The UV radiation levels during much of December and January across Australia are around 11 - that is extreme. Sunscreen should be part of your sun protection plan.
Fun fact: it is the fact that the sun is high in the sky, that the air is clear and low humidity that leads to the extreme UV levels. There is a popular misconception that the hole in the ozone layer is the cause of the extreme UV in Australia; but the hole is much further south so does not actually play a role.

There are a few small but very annoying creatures you may well meet in the warmer months. Flies, mosquitoes and leeches. They can be rather persistent. DEET-based insect repellent is the most effective. Be mindful that DEET is only to be applied to exposed skin (it is best not to cover it and is not effective on clothing, and will may damage synthetic fibres).
Apply insect repellent around ankles (for leeches and mosquitoes) and face (for flies).
Some people may prefer to wear a hat and fly net over their head.
When it raining, remember at least there are no flies out.
Just like your skin, your lips can get sunburnt. The skin that forms your lips does not have hair or sweat glands, so it does not have the same natural protective layer of body oils as other skin. This is part of the reason your lips dry out faster and can become cracked, rough or sore. Lips can even blister with sunburn - not fun.
Lots of people love lip balm on longer walks. Get lip balm with an SPF rating of higher than 30. Also, get a lip balm that will not melt easily on hot days.
Gadgets & Electronics
Your phone can run this app, play music/podcasts (pack some headphones), be an ebook reader, a backup torch and a good camera.
Before leaving home, make sure you download all the walks in the app. The maps work offline if you have already downloaded them. Download any other books or music you might want.
It is worth packing your phone in a water and drop-proof case, or at the very least putting in a snap-lock bag to give it some protection.
Put your phone in aeroplane mode, power-saving mode, silent and turn the screen brightness right down to maximise battery life and minimise annoying other walkers.
More and more gear on track is charged via USB (5V). Many mobile phones, satellite communications devices, torches, cameras, UV water treatment systems and more.
There are no charging ports at campsites, so if you want to charge your devices then consider carrying a battery pack. One 5,000 - 10,000 mAh battery pack will suit most people for about 1 week on track.
You can estimate how many times a battery will charge a device (assuming the batteries are similar voltage - normally 3.3v). There is about a 20% loss in power when charging like this. So a 2,000 mAh battery can be fully charged about four times with a 10,000mah battery pack. Assuming the battery pack rating is the amount of power it can provide you - so test it before you go.
PRO TIP: use your battery pack at home as your only power source to charge your phone and other devices you plan on using, to get a sense if your battery pack is big enough.
PRO TIP: Battery packs a much less efficient when they are cold. Warm them up inside your jumper whilst wearing it before use. Remember that all your device batteries will be much less efficient when cold and run-flat much quicker. So in colder months, you will need a bigger battery pack.
This app uses your phone's GPS, and the maps can be stored for offline use. Phones are not the most power-efficient devices out there, so some people prefer to use a dedicated GPS unit for navigation that tend to also have better GPS reception in dense bushland. These can be handy in poor visibility, if you get lost or if you want to track your progress with minimal map reading.

Cooking (share among your group)
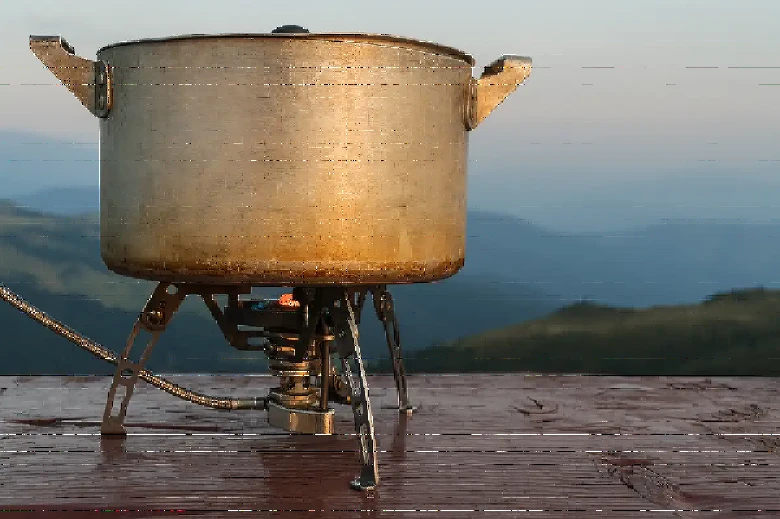
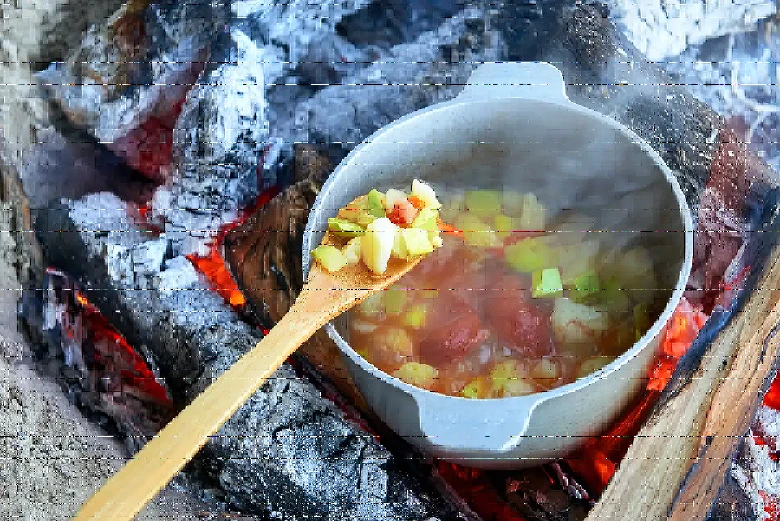
Campfires are banned in many walking areas, so if you want to warm meals and hot drinks, a fuel stove is a great way to go. Cold meals are just not as much fun. Good news is there are plenty of lightweight cooking options.
Small, easy to use, gas cylinder-powered stoves like the JetBoil seem to be the most popular on the track. Liquid fuels stoves such as Trangia also work.
PRO TIP: If cooking outdoors, guard your stove against the wind to save lots of fuel and cooking time.
PRO TIP: It gets hot below most stoves, don't use a stove directly on a timber table/platform. If there is a plate cook on that or another surface that will not burn.
PRO TIP: Avoid cooking on picnic-style tables. I have seen several people get nasty burns from boiling water spilling into their laps and groin. Ouch.
Your stove runs on fuel; make sure you have enough for the whole trip and a little extra. Your stove will use a little more fuel in colder temperatures and higher elevation. You can get a sense of how much fuel you need by cooking a few meals and weighing your fuel before and after. Multiply it out by how many meals you plan to cook, adding a bit more for good measure. To make the test at home more realistic, start cooking with water from the fridge rather than the tap. Also make sure you have enough for hot drinks, breakfasts etc. The amount of fuel you need will vary greatly depending on your stove, time of year, types of meals, number of days, and how many people you are feeding.
If you are flying to your walk you can't carry fuel on the plane, so make sure you buy some when you get there. There are limited fuel supplies at the start of the walk.
PRO TIP: Although it adds a small amount of extra weight, it is better to carry fuel in at least two containers - if one fails, you don't lose all your fuel in one go.
Carry some matches or a small lighter in a waterproof bag. Even if your stove has a built-in ignition system, these do fail; an extra source of fire is a good backup.
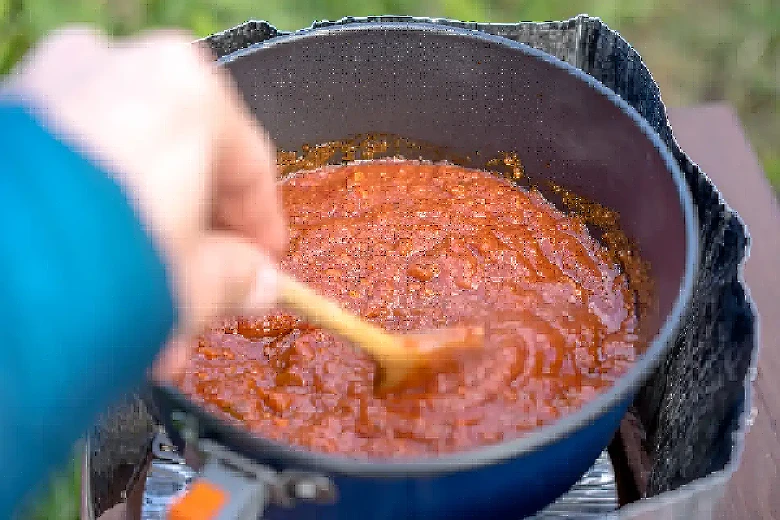
In Australia, we traditionally call a cooking pot for camping a 'billy'. Some stoves have very specific pots to match, and some stoves give you more freedom. The main job is to hold water as you bring it to the boil, but you may also be cooking food in the pot. For some meals or larger groups, you may want more than one pot but aim for single-pot meals to minimise weight. A lid, insulation and heat exchanges all help you save fuel. Think about how you are going to hold your pot (does it have a handle or do you need some grips for it?).
For one or two people, you generally only need a 0.5 to 1-litre pot.
Titanium pots are the lightest; aluminium is still very light and much cheaper.
If you have more fancy meals or bigger groups you may well need a few pots.
PRO TIP: One way of saving the need for extra pots is rehydrating meals in a freezer-style snap-lock bag, inside a cosy. Boil the water and add food to bag then add water. This can reduce your pack weight, washing up and give you a bit more variety in your meals. Since I pre-cook and dehydrate my rice, I can prepare my rice (and pasta) this way, and my meat in a separate bag. You can still wash and reuse the bags.
Generally, you will need a knife for meal preparation and a metal spoon for stirring.
I just use my pocket knife and my spoon/fork for eating.
PRO TIP: If you are buying a new metal spoon, keep an eye out for one with a flatter front edge. This flatter edge is better for stirring and for flipping food (like a spatula).
Take a lightweight kitchen scrubber for washing your dishes - Something that washes and dries easily. We do not use detergent on track, as it can have an impact on the environment. A scourer and warm water are very effective.
There are so many options for healthy, yummy and affordable food. You will enjoy your walk that bit more if you spend some time planning a great menu. It may be tempting to grab all your meals from the camping store; this can be an expensive option and is likely to feel pretty repetitive after a few days.
You can buy freeze-dried meals from camping stores (about $10-15 per person per meal). There are also some yummy lightweight and cheaper options off-the-shelf from your supermarket. My preferred method is to use a dehydrator (about $120) to prepare my meals at home. It all comes down to personal choice. A mix of each of these approaches is often the best choice.
PRO TIP: Some days, you will be tired and want simple and quick meals.
PRO TIP: Sharing some simple pre-dinner snacks or drink with fellow walkers can be a great way to build a strong community and enjoy getting to know some fantastic people.
PRO TIP: Be adventurous with your food, avoid having the same breakfast, lunch and dinner every day.
PRO TIP: If it is raining heavily, preparing lunch can be tricky. Consider setting up a tent fly for shelter or having some simple lunches that you can eat on the move.
Luxury Items
A small daypack is handy for side trips where you can carry just the essentials and leave your main pack to collect on your return to the main track. Choose something very lightweight but durable enough to carry what you want. Some full packs have 'brains' (top section of your pack) or other pockets that can be used as daypacks, saving you from re-packing and extra weight.
PRO TIP: Always carry enough gear to deal with an emergency and leave you main packs out of the way but where you can find them easily even if the weather changes.
PRO TIP: When leaving your pack at an intersection, be mindful of the wildlife. Some creatures can undo buckles, straps and zippers. I have spoken to a handful of people who have lost days of food from ravens raiding their packs. Tie straps, put on pack covers and position bags to protect the birds and your food.

A nice luxury is to carry a very lightweight 5L water bladder. You can fill this and a few water bottles up and bring it to your cooking area. It saves you walking back and forth - definitely not needed, but I always carry one.
Some people carry SLR's with multiple lenses, some carry a smaller pocket-sized compact camera, and many people carry their phones to use as a camera. If you have the option of a waterproof camera, you will be able to enjoy taking photos in more varied conditions. The best images are ones that you actually capture, so whatever camera you carry; make sure you can access it readily, know how to use it and have plenty of batteries.

There's plenty of wildlife on track, a pair of binoculars will help you see them up close without disturbing them. We do list the more common birds and other creatures you will see on track in the app, but you may want to carry a field guide if you are also carrying binoculars. Pack them so you can quickly access them, but still protect them from the rain and bumps.

If you like to read in the evening, pack a book or an e-book. You might want to just curl up at the end of the day with a good book or learn more about the history, cultures, landscape or ecology of the areas you are walking through.

Evenings on a bushwalk are often spent in the company of others, especially at camp. You can take a pack of cards to play a game or two. Plastic cards have a much longer life span the cardboard ones. Invite fellow walkers to join you in a game. Do be mindful of people in the area who might want quiet or alone time, and play your game in a way that is respectful of all on track. I have made some great friends playing cards with strangers on bushwalks.

You might want to write a diary, or maybe write down phone numbers of new friends you get to know on the track.