Over two days, this classic walk explores the coast from Boyd Tower to the Green Cape Lighthouse in the south. Hegartys Bay Camp is over halfway and is the quietest campsite in the park (alternative camp at Saltwater creek). The walk explores many of the scenic and historic highlights of Ben Boyd National Park. It is worth taking the time to enjoy the many bays and vantage points along the way.
Light to Light Walk 2 days
Light to Light Walk 2 days


2 Days
30.9 km One way

794 m
Hard track


(0km) Ben Boyd car park → Boyd Tower Intersection

280 m
5 mins
0m
-15m
Very easy
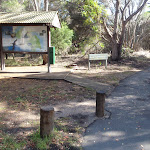
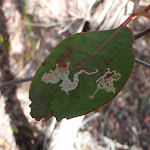
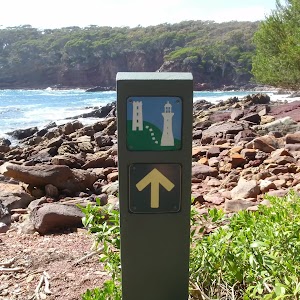
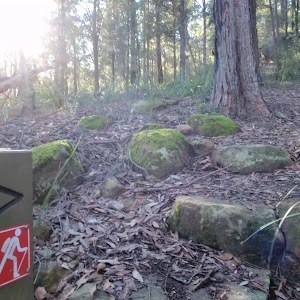
From the car park, this walk follows ‘Boyd Tower 300m’ arrow[1] along the asphalt footpath, between the timber bollards[2]

to pass the information sign[3][4] (and parking pay station, on the left). The path leads gently downhill for 45m to pass a ‘Welcome to Ben Boyd NP and Boyd’s Tower’ information sign[5]

then the path meanders for 150m through the melaleuca forest to find a seat

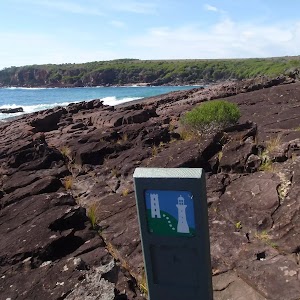
and the ‘Gambling on the Future’[6] & ‘Boyd’s Folly?’[7] information signs. Just 35m further along the path you pass another seat

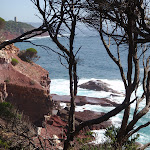
with pleasant coastline view[8]. From here the path starts to lead gently uphill for 50m to come to a clear 3-way intersection[9] (with a timber path and Boyd Tower on the left).
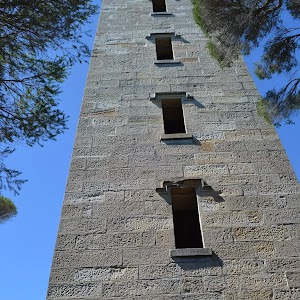
Boyds Tower
Boyds Tower[10] was commissioned by Benjamin Boyd and originally designed to be a lighthouse. After the Government rejected the proposal of the private lighthouse, Boyd changed tact and built the Sydney sandstone tower for whale spotting. The tower gave his whaling ships a strong advantage over other whalers in the area.
Built in 1847, Boyds Tower is a large sandstone tower on the southern head of Twofold Bay in Ben Boyd National Park. The top of the tower bears the BOYD title, and boast several viewing points. The ground floor of the tower is open to the public and is well worth exploring.
Boyd was declared bankrupt soon after completing the tower and left Australia for the Californian goldfields. Boyd died in the Solomon Islands in 1851 whilst hunting game.
“Ben Boyd’s Tower is watching –
Watching o’er the sea
Ben Boyd’s Tower is waiting
For her and me.” Henry Lawson (1910)
The bottom floor of the tower is open to the public via a 1.2m wide sandstone door frame[13].
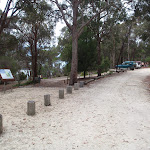
(0km) Ben Boyd Car park information sign → Red sands bay
2.4 km
48 mins
71m
-99m
Hard track
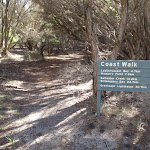
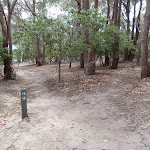
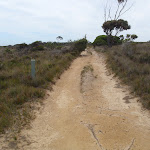
Veer left: From the information sign, the walk heads down the hill, following the low posts away from the information sign, to a signposted intersection on the left. From the intersection, the track follows the sign for ‘Coastal Walk’ down the hill away from the car park. The track soon passes an information sign on the right before tending right, down the hill to be above the coastline. The walk then continues with the coast on your left, down stairs into a gully and back out. The track winds and undulates for some time, leading away from the coast. The track then continues back towards the coast, to a view of the tower on your left and a rock island below in the sea.
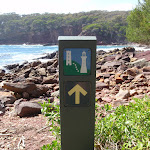
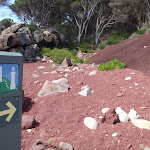
Continue straight: From the intersection, this walk heads along the track, keeping the the coast to the left. The track soon leads out of the heath and winds along the hillside, tending away from the coast (which disappears below the trees on the left). The walk then winds down into a gully with access to the rocks (below on your left). Rising up and out of the gully, the track winds across the hillside and then down into a rocky bay with an arrow marker. The walk continues across the red flat rock at the back of the bay, coming to the arrow marker[14] pointing inland, in the middle of the bay.
Continue straight: From the intersection, this walk heads along the track, keeping the the coast to the left. The track soon leads out of the heath and winds along the hillside, tending away from the coast (which disappears below the trees on the left). The walk then winds down into a gully with access to the rocks (below on your left). Rising up and out of the gully, the track winds across the hillside and then down into a rocky bay with an arrow marker. The walk continues across the red flat rock at the back of the bay, coming to the arrow marker[14] pointing inland, in the middle of the bay.
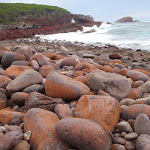
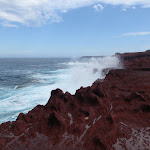
Red sands bay

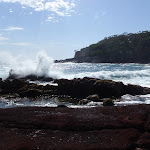
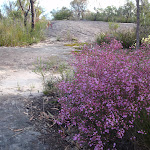
Red sands bay (not officially named) is a north-facing bay between Boyd Tower and Leather Jacket Bay in Ben Boyd National Park. The rocky bay is accessed via the Light to Light walk. The beach in this bay is made up of small boulders and a fine red gravel. Most of the red gravel is on the western side of the bay. The gravel is made from the sea smashing the red siltstone into small pieces. The red sands/gravel of this bay makes for a fantastic contrast on sunny days.
(2.44km) Red sands bay → Int. Light to Light and Leather Jacket Pt Trks
410 m
8 mins
21m
-3m
Hard track
Turn right: From the red rock bay, this walk follows the track marker away from the ocean and up the stairs. The track climbs over the hill to head down into a creek bed, where it heads up the hill keeping the ocean on the left of the track. The stairs lead this walk around the hill to the right and then to a signposted intersection with a service trail.
(2.84km) Int. Light to Light and Leather Jacket Pt Trks → Int. Light to Light and Leather Jacket View Trks
740 m
13 mins
16m
-19m
Moderate track
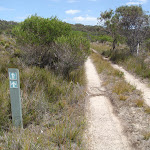
Continue straight: From the intersection, this walk follows the arrow of the tower sign through the small clearing and along the clearer service trail. The track winds quickly through the heath for some time to meet a signposted intersection.
Turn left: From the intersection, this walk follows track marker down the hill, towards the ocean. The track leads downhill to a signposted intersection.
Veer right: From the intersection, this walk follows the track marker past a white post, keeping the ocean and the other service trail to the left of the track. The walk continues along the service trail for a short time to a signposted intersection.
Continue straight: From the intersection, this walk follows the track marker, leaving the fork in the trails behind and heading down the slight hill towards the ocean. The track continues down the hill to a signposted intersection.
(3.58km) Int. Light to Light and Leather Jacket View Trks → Leatherjacket Bay
1.1 km
19 mins
13m
-32m
Hard track
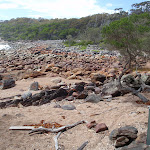
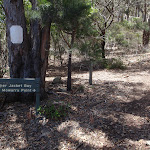
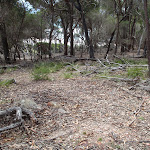
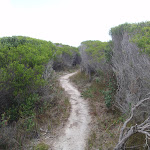
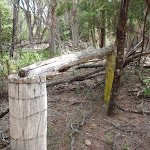
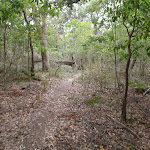
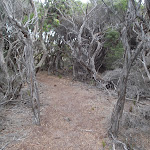
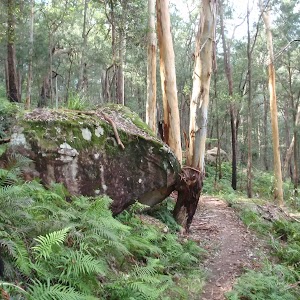
Turn right: From the intersection, this walk follows the track marker into the tall heath, towards the views of the ocean. The track then winds through the heath, passing through some large areas of tall heath and melaleuca trees. The walk follows white posts through the heath to then enter an area of tall eucalypt bush. The track soon passes an old farm fence post on the left of the track while winding down the hill into Leather Jacket Bay. The track follows the creek across the back of the rocky bay to a well signposted clearing – the campsite.
Leather Jacket Bay
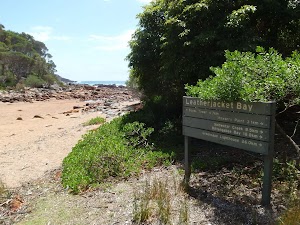
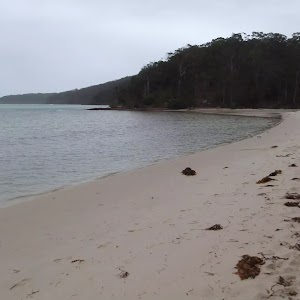
Leather Jacket Bay is a north-east facing beach between Boyd Tower and Mowarry Point in the Ben Boyd National Park. The bay has a sandy beach with small rock boulders between the sand and the ocean. The wooded forest behind the bay provides some shade, making this a great place to rest on the Light-to-Light walk. The bay can be access by the Light-to-Light track or by Newtons Road service trail from Edrom Rd.
(4.66km) Leatherjacket Bay → Mowarry Bay car park
2.7 km
57 mins
113m
-108m
Hard track
Turn right: From the clearing, this walk follows the sign up the hill along the service trail, away from the clearing and the bay. The track soon comes to a signposted intersection.
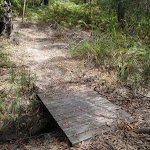
Turn left: From the intersection, this walk follows the sign to ‘Mowarry Point’ up the hill. The track winds up the hill to continue across the ridge, with the track soon heading down the hill over large speed bumps. The walk comes to a small bridge over a creek bed, after which it leads up a hill, tending left to head across the flat to an unsignposted intersection on the left.
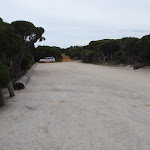
Continue straight: From the intersection, this walk heads down the hill, leaving a track behind on the left. This walk leads down into a saddle, to rise up again along a section of yellow dirt service trail. The track continues to undulate and wind for some time, with views of the ocean appearing on the left of the track under the trees. The track then leads down the hill, tending right for some time to the signposted cul-de-sac at Mowarry car park.
Turn left: From the intersection, this walk follows the sign to ‘Mowarry Point’ up the hill. The track winds up the hill to continue across the ridge, with the track soon heading down the hill over large speed bumps. The walk comes to a small bridge over a creek bed, after which it leads up a hill, tending left to head across the flat to an unsignposted intersection on the left.
Continue straight: From the intersection, this walk heads down the hill, leaving a track behind on the left. This walk leads down into a saddle, to rise up again along a section of yellow dirt service trail. The track continues to undulate and wind for some time, with views of the ocean appearing on the left of the track under the trees. The track then leads down the hill, tending right for some time to the signposted cul-de-sac at Mowarry car park.
(7.32km) Mowarry Bay car park → Mowarry Creek Sth bank
80 m
1 mins
1m
-2m
Hard track
Turn left: From the intersection, this walk follows the sign to ‘Mowarry Point 500m’, down the hill. The track leaves the car park through the gap in the logs and tends right, heading down the hillside to an intersection (with a track marker present), above a creek.
Turn right: From the intersection, this walk follows the track marker down the stairs and upstream of the creek, to turn left across the rocky creek bed. The walk heads up the stairs, leading to a service trail.
Turn right: From the intersection, this walk follows the track marker down the stairs and upstream of the creek, to turn left across the rocky creek bed. The walk heads up the stairs, leading to a service trail.
(7.4km) Mowarry Creek Sth bank → Mowarry lookout
1.8 km
34 mins
56m
-47m
Hard track
Turn right: From the intersection, this walk follows the sign up the hill, tending left. The track soon meets a flatter area where this walk comes into sight of a beach, below on the left. The walk passes two access tracks on the left which lead down to the beach. The track continues to a small clearing at an intersection, marked by an arrow.
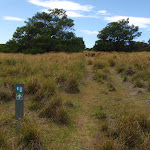
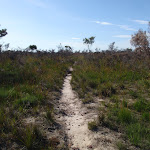
Continue straight: From the intersection, this walk heads up the hill, keeping the ocean below on the left. The track winds up the hillside to a large signpost ‘Mowarry Point’. This walk follows the arrow to ‘Saltwater Creek 5.4km’ into an open grassland, following numerous track markers through the open grass area and patches of heath. The walk soon turns right, up the hill, keeping the ocean well below to the left of the track. The track then enters and winds through an area of heath. Many trees cover the tracks and trodden paths in this part of the walk. The track passes through these trees to a clearing with views towards Boyd Tower and waves crashing below.
Continue straight: From the intersection, this walk heads up the hill, keeping the ocean below on the left. The track winds up the hillside to a large signpost ‘Mowarry Point’. This walk follows the arrow to ‘Saltwater Creek 5.4km’ into an open grassland, following numerous track markers through the open grass area and patches of heath. The walk soon turns right, up the hill, keeping the ocean well below to the left of the track. The track then enters and winds through an area of heath. Many trees cover the tracks and trodden paths in this part of the walk. The track passes through these trees to a clearing with views towards Boyd Tower and waves crashing below.
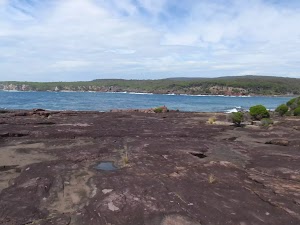
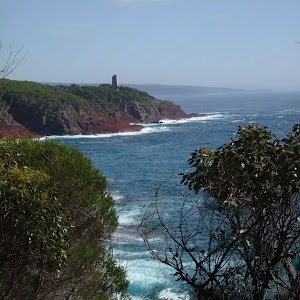
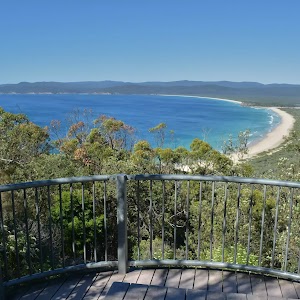
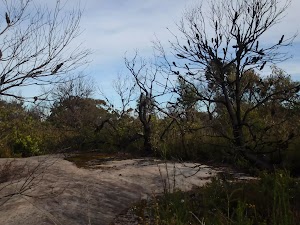
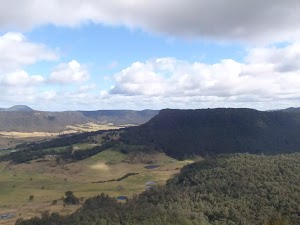
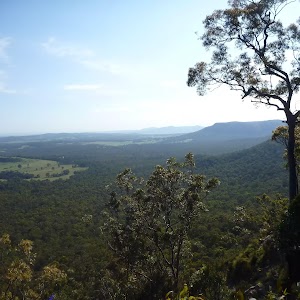
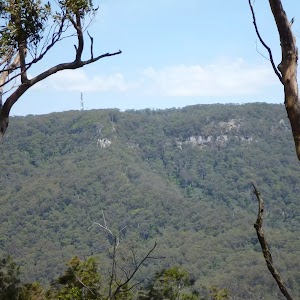
Mowarry Point lookout
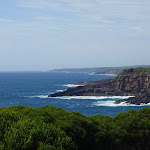
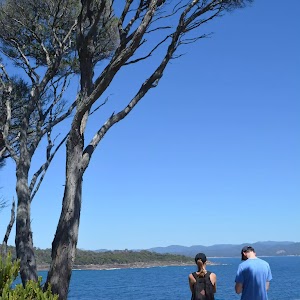
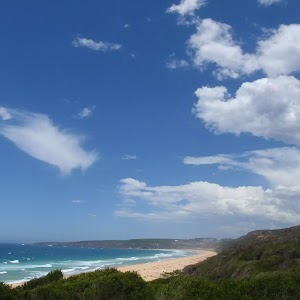
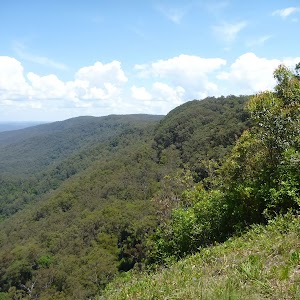
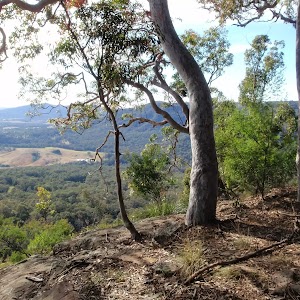
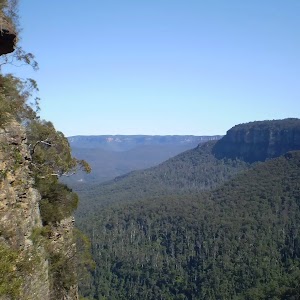
Mowarry Point lookout is an informal vantage on Mowarry Point in Ben Boyd National Park. There is no signage or other infrastructure. The lookout provides a unobstructed view to the north and north-east, along the coast of Ben Boyd National Park. The view extends up to Eden, into Twofold Bay and out over the South Pacific Ocean. There are some Melaleuca trees that offer limited shade.
(9.15km) Mowarry Lookout → Red rocks
2.6 km
48 mins
60m
-66m
Hard track
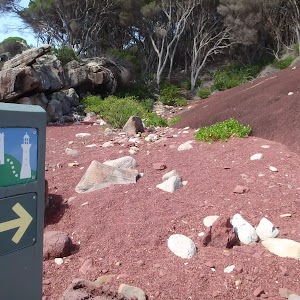
Veer right: From the intersection, the walk winds through the heath, keeping the ocean to your left. The track heads through sections of low and tall heath and eucalypt bush. The walk begins to wind down the hill, and passes a clearing with a fire place, leading onto the rocky beach where there is an arrow marker standing in the pebbles of the beach.
Veer right: From the signpost, the walk heads towards the next arrow sign within sight, keeping the ocean on the left. The walk crosses the pebbly beach to the arrow marker, where another can be seen further along the coast on the red rock shelf. The walk meanders across the rock shelf to the track marker, which points into the bush. The walk follows this arrow away from the coast and up the stairs into the heath, where the track winds for quite some time through the heath and then bush. The track then heads back through the bush, down onto a red rock platform above the sea. The walk continues down the rock platform following the arrow signs, with the sea on the left of the track, coming to be opposite a set of stairs (on the right of the track).
Veer right: From the signpost, the walk heads towards the next arrow sign within sight, keeping the ocean on the left. The walk crosses the pebbly beach to the arrow marker, where another can be seen further along the coast on the red rock shelf. The walk meanders across the rock shelf to the track marker, which points into the bush. The walk follows this arrow away from the coast and up the stairs into the heath, where the track winds for quite some time through the heath and then bush. The track then heads back through the bush, down onto a red rock platform above the sea. The walk continues down the rock platform following the arrow signs, with the sea on the left of the track, coming to be opposite a set of stairs (on the right of the track).
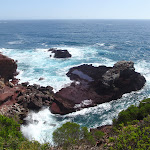
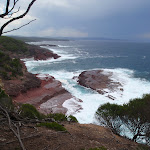
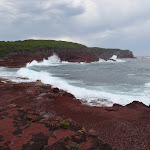
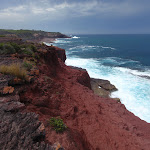
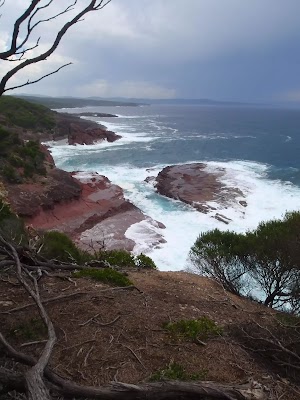
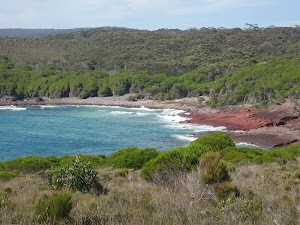
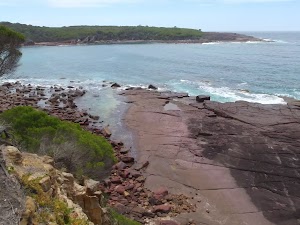
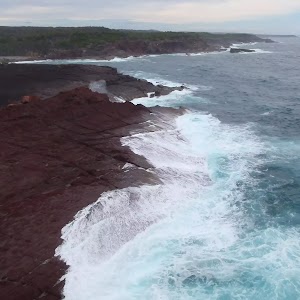
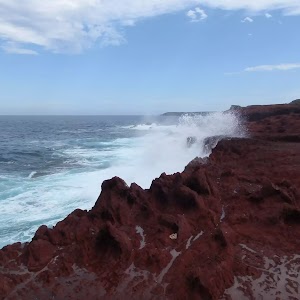
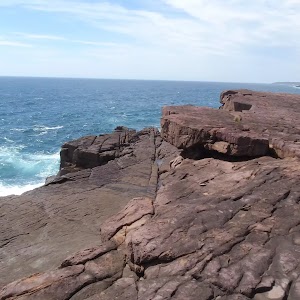
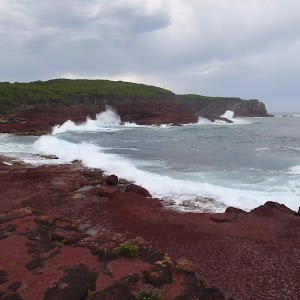
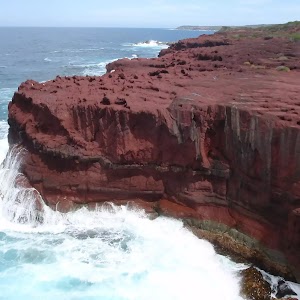
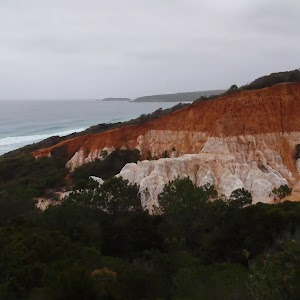
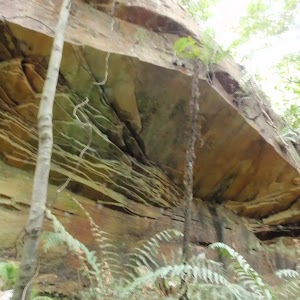
Red Cliffs
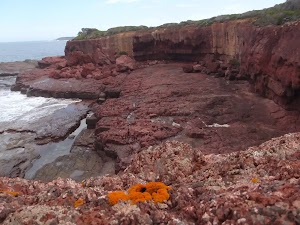
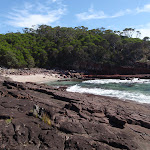
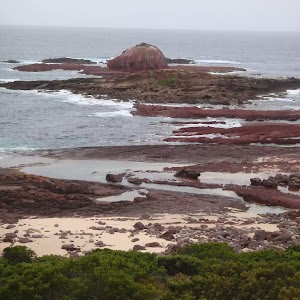
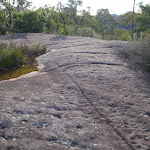
Red Cliffs – These fantastic red coastal cliffs are found about 1km north of saltwater creek in Ben Boyd National Park. The cliffs are made of a red siltstone. As the name suggests, this rock is made from deposited silt, making it much finer grain than sandstone. The red silt came from nearby volcanic eruptions long ago, and is clearly different from the other brown siltstone and sandstone in the region. The cliff is unfenced and provides views out to sea and into a few surrounding bays. More info.
(11.74km) Red Rocks → Saltwater Creek Beach Nth
1.5 km
27 mins
29m
-36m
Moderate track
Turn right: From the rock platform, the walk heads up the stairs away from the rock shelf and ocean. The walk winds through the heath along the track, leading away from the coastline. After a while, the heath gives way to Melaleuca trees. There are numerous fallen trees and hanging branches over the track, so walkers should take due care. The track leads down the hill, with views of the ocean under the trees. The track passes through an old farm fence and soon comes down onto Saltwater Creek Beach. The track here is signposted on the ocean side of the headland.
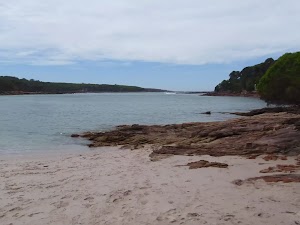
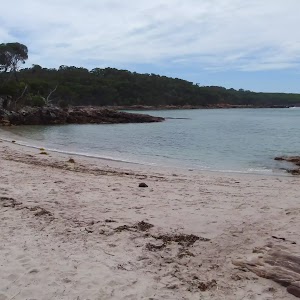
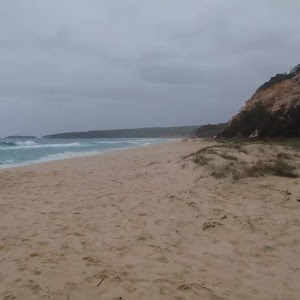
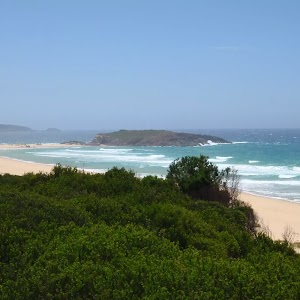
Saltwater Creek Beach
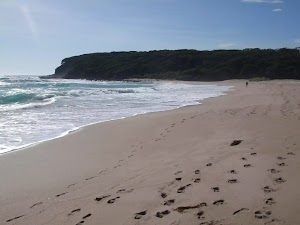
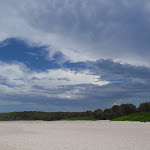
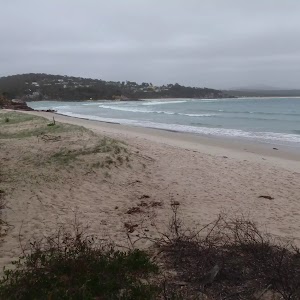
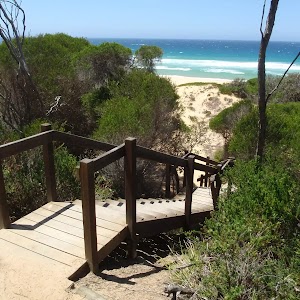
Saltwater Creek meets the South Pacific Ocean at a beautiful white sand beach in Ben Boyd National park. The beach looks north-east and has a rock shelf at either end. The wide Saltwater Creek forms a lagoon at the northern end, popular for swimming. Woodburn Creek also forms a lagoon on the southern end of the beach. Both creeks have a brown colouration from the tea tree, that forms a beautiful contrast with the white sand and blue ocean. The back of the beach is heavily wooded, providing some shade, and is home to the Saltwater Creek campsite. The beach can be accessed from the Saltwater Creek campsite at the end of the access road from Duck Hole Road.
(13.22km) Saltwater Creek Beach Nth → Saltwater Creek Campsite Information Sign
180 m
3 mins
2m
0m
Moderate track
Turn right: From the intersection, the walk follows the sign to the camping ground across the sandbar, which separates the creek (on the right) from the ocean (on the left). The track heads up the stairs on the opposite side, to follow the fence line through to the day-use parking area. The track continues through to the information signs just behind the day-use area.
Saltwater Creek campground
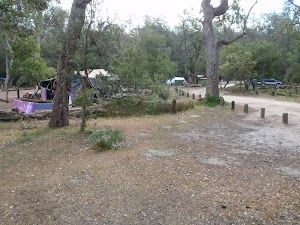
Salwater Creek campground is a nice place from which to access the coastal walking track -there is plenty of swimming, fishing and snorkeling to be done as well. There are some rainwater tanks on site, but be prepared for them to be empty.
(13.4km) Saltwater Creek Campsite Information Sign → Saltwater Creek Beach Nth
180 m
3 mins
0m
-2m
Moderate track
Turn around: From the information signs at Saltwater Creek camping area, the walk heads through the ‘Day use’ parking area to the far left corner. The track then follows the track-marker through the fenced area and onto the beach between the creek and ocean. The track continues towards the bush on the other side, where there is a signposted intersection.
(13.58km) Saltwater Creek Beach Nth → Saltwater Creek Beach Sth
490 m
8 mins
5m
-2m
Moderate track
Turn right: From the intersection, this walk follows the sign to ‘Bittangabee Bay’ heading to the far end of the beach, keeping the ocean on the left. This walk tends right, towards the dunes, to meet a signposted intersection just in the bush, on the hill above the creek.
(14.07km) Saltwater Creek Beach Sth → Hegartys Bay Camp
4.2 km
1 hr 18 mins
104m
-100m
Hard track
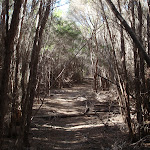
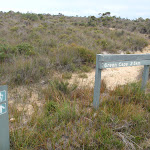
Continue straight: From the intersection, this walk follows the sign to ‘Green Cape Lighthouse’ across the hill, keeping the creek below on the right. The track soon turns left up the hill, away from the beach and creek, and then heads up the hill to an open grassland. The track meanders for a considerable time through different vegetation types – grasslands then heath, then melaleuca, and eucalypts/scrub, before reversing the order up the hill to continue around the flat of the grassy headland. The track continues in this way, passing views of Green Cape Lighthouse to the south and the cliffs, to wind down the hill onto Hegartys Bay beach.
Continue straight: From the beach, this walk heads along the rock platform following the arrow markers. The walk winds around the rock features, then turns away from the ocean and lead up stairs into the bush behind the bay. The track winds above the bay (below on the left) for a short time, to then pass a fireplace and seats, before coming to a signposted clearing ‘Hegartys Bay Camping Area’ with bench seats and a fireplace.
Continue straight: From the beach, this walk heads along the rock platform following the arrow markers. The walk winds around the rock features, then turns away from the ocean and lead up stairs into the bush behind the bay. The track winds above the bay (below on the left) for a short time, to then pass a fireplace and seats, before coming to a signposted clearing ‘Hegartys Bay Camping Area’ with bench seats and a fireplace.
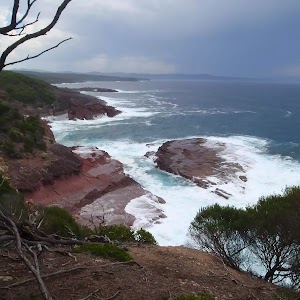
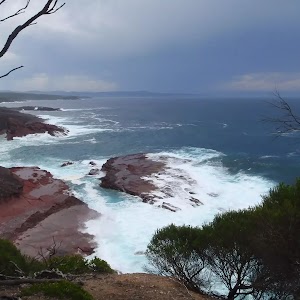
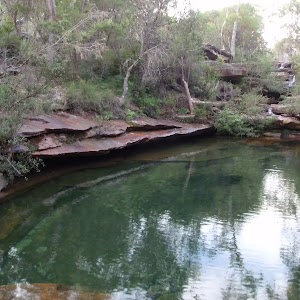
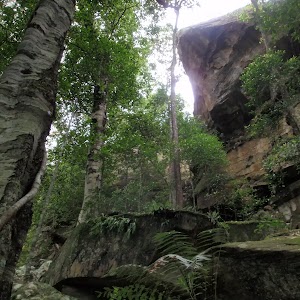
Hegartys Bay
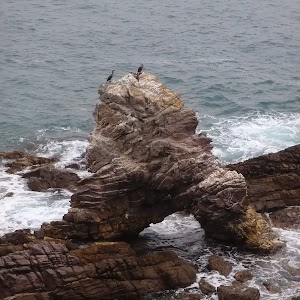
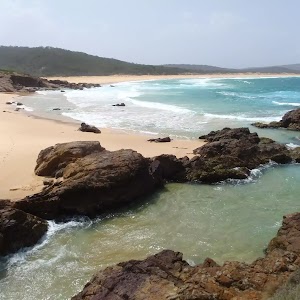
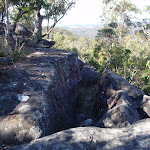
Hegartys Bay is a north-east facing bay, about 2km north of Bittangabee in Ben Boyd National Park. The bay has many small boulders at the apex that then fade to rock shelves at each end. The bay is walled by red cliffs at the entrance and the northern wall has some spectacular examples of rock folding. The bay can be accessed along the Light to Light track and is home to a bush campsite.
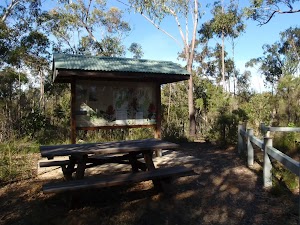
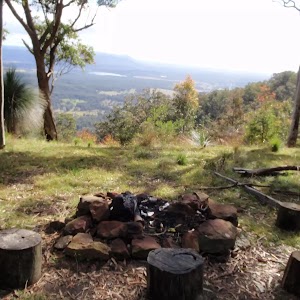
Hegartys Bay camping area

Hegartys Bay camping area is a basic bush campsite on the Light to Light walk, about 2km north of Bittangabee. The campsite is signposted and is just north of a small creek that leads to Hegartys Bay. There is another, smaller campsite that is not signposted, about 50m north. The creek is very unreliable and other than some impromptu chairs made from driftwood, there are no facilities provided. The campsite is nestled in a clearing among the tall, dense bush, providing some shade and shelter from winds.
End of day 1
This is the planned overnight stay for the end of day 1, happy camping.
(18.29km) Hegartys Bay Camp → Black cliffs south
1.9 km
35 mins
38m
-40m
Hard track
Continue straight: From the camp area, this walk keeps the camp on the right and ocean far on the left. The track heads down hill and over a creek, then winds up and out of the creek to meander across the headland. The track continues to wind through heath and melaleucas on the headland for some time, to go down the stairs onto the rock platform.
Continue straight: From the intersection, this walk follows the cairns and track markers along the rock, with the ocean to the left. The walk follows the rockshelf down to an area where it starts to slope down into the sea – this is marked by numerous cairns and an arrow on a boulder.
Continue straight: From the intersection, this walk follows the cairns and track markers along the rock, with the ocean to the left. The walk follows the rockshelf down to an area where it starts to slope down into the sea – this is marked by numerous cairns and an arrow on a boulder.
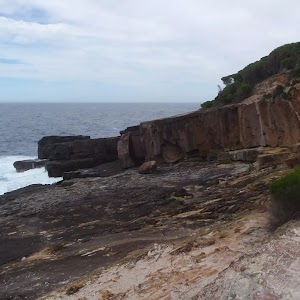
Black cliffs
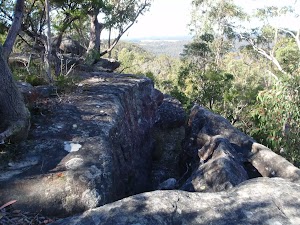
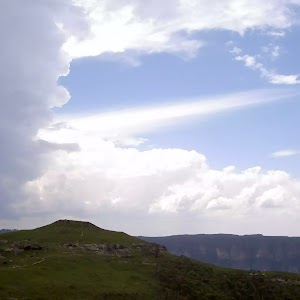
The black cliffs of Ben Boyd National Park provide a great vantage point. The headland on the north side of Bittangabee has a fairly large clearing on a rock platform, high above the ocean. There are great views out to sea and into the mouth of Bittangabee Bay. There are no fences or facilities at this informal lookout. Being dark in colour, this rock platform can get very uncomfortable on hot days – trees on the south side provide some respite with shade. The rock slopes into the sea on the south side, but would be too dangerous for swimming.
(20.22km) Black cliffs south → Bittangabee Creek
1.4 km
29 mins
50m
-51m
Moderate track
Veer right: From the intersection, this walk heads away from the ocean, behind, and bay, on the left of the rock shelf, leading up into the bush where a cairn is placed. The track winds along the hillside, following the track markers bolted to the trees. The track tends right, up the hill, then veers left down into a gully, with a rocky creek bed at the bottom. The track continues down to cross the creek.
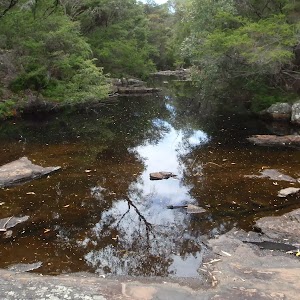
Bittangabee Creek
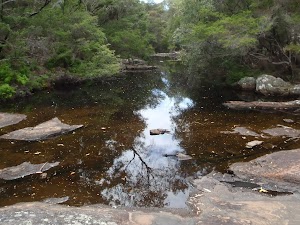
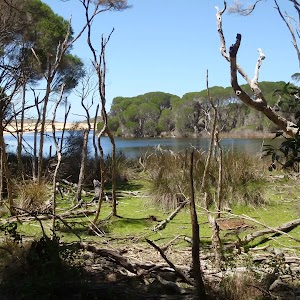
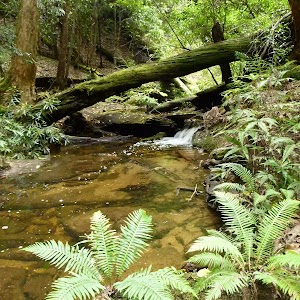
Bittangabee Creek is a small creek feeding Bittangabee Bay in Ben Boyd National Park. The creek enters the bay and is crossed by the Light to Light track about 800m north-west of Bittangabee Campsite. The creek provides a quiet place for people to paddle and relax.
(21.65km) Bittangabee Creek → Imlay House Ruins
580 m
12 mins
23m
-10m
Moderate track
Continue straight: From above the creek, the walk winds above the gully (below on your left). The track veers right, and soon meets a signposted intersection.
Veer right: From the intersection, the walk follows the sign ‘Via Ruins’ up the hill. The track tends right as it climbs, soon winding up to a large black wooden platform. This platform overlooks the ruins.
Veer right: From the intersection, the walk follows the sign ‘Via Ruins’ up the hill. The track tends right as it climbs, soon winding up to a large black wooden platform. This platform overlooks the ruins.
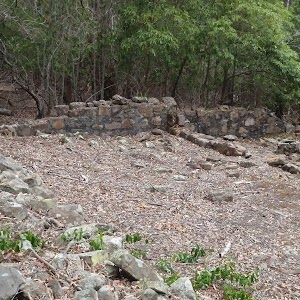
Imlay House
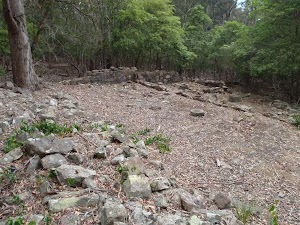
Imlay House ruins still show the foundations of a house built by the Imlay brothers in 1844. The ruins are found in Bittangabee Bay in Ben Boyd National Park, along the Light to Light track. The house was to be a station for the Imlay family to further their grazing and whaling in the area. It appears the stone house was never completed, with the brothers dying in 1846 (George) and 1847 (Alexander). Soon after the Imlay brothers died, Benjamin Boyd began using the bay for his own whaling company in 1848. More info.
(22.24km) Imlay House Ruins → Bittangabee Bay Picnic area
300 m
6 mins
3m
-15m
Moderate track
Continue straight: From the black platform, this walk keeps the platform and ruins on the left of the track, heading down the hill. The track winds quickly down to a signposted intersection with views of a beach below.
Veer right: From the intersection, the walk heads down the hill towards the water. The track goes across a rocky creek bed to rise up the other side of the gully. The walk continues up the hill to soon find formed log road barriers on the right and then a signposted intersection and picnic area.
Veer right: From the intersection, the walk heads down the hill towards the water. The track goes across a rocky creek bed to rise up the other side of the gully. The walk continues up the hill to soon find formed log road barriers on the right and then a signposted intersection and picnic area.
(22.53km) Bittangabee Bay Picnic area → Bittangabee Beach
90 m
2 mins
0m
-6m
Moderate track
Turn left: From the road just near the picnic area, this walk heads down the hill, passing through the picnic area and down the stairs. The water and beach are visible through the trees, the track soon leading down onto the beach. At the end of this side trip, retrace your steps back to the main walk then Turn left .
Bittangabee Bay Beach
Bittangabee Bay Beach, Ben Boyd National Park, is a small beach at the south-western corner of the bay. The beach can be accessed by a short walk from Bittangabee picnic area in Ben Boyd National Park. The yellow sand beach has a small creek and lagoon behind. The beach also has rock platforms at each end and is fairly well-protected from swells, being tucked away in the bay. The historic storehouse is visible on the shore to the right.
(22.53km) Bittangabee Bay Picnic Area → Int. Light to Light Trk and Bittangabee Storehouse Trk
240 m
6 mins
13m
-9m
Moderate track
Continue straight: From the picnic area, the walk follows the sign to ‘Camping Area 500m’, keeping the car park on your right. The track leads below the road (above on the right) for some time, following the arrow markers to a signposted intersection next to the log road barriers.
Turn left: From the intersection, the walk follows the sign for ‘Walking Track’ (not the same direction as the ‘Beach’ arrow) down the hill. The track leads down the hill a short way to an arrow track marker.
Turn left: From the intersection, the walk follows the sign for ‘Walking Track’ (not the same direction as the ‘Beach’ arrow) down the hill. The track leads down the hill a short way to an arrow track marker.
(22.77km) Int. Light to Light Trk and Bittangabee Storehouse Trk → Int. Light to Light Trk and Bittangabee Storehouse Trail
150 m
3 mins
2m
-10m
Hard track
Continue straight: From the intersection, this walk does not follow the arrow marker but heads straight down the hill towards the water. The walk steps down to the water’s edge where there is a roofless building on the right. The walk follows around the building on the water side, to an information sign.
Turn right: From the intersection, the walk leads up the hill, keeping the bay on your left and the storehouse ruins behind on the right. The track veers right, up the hill to a signposted intersection. At the end of this side trip, retrace your steps back to the main walk then Turn left .
Turn right: From the intersection, the walk leads up the hill, keeping the bay on your left and the storehouse ruins behind on the right. The track veers right, up the hill to a signposted intersection. At the end of this side trip, retrace your steps back to the main walk then Turn left .
Bittangabee Storehouse ruins
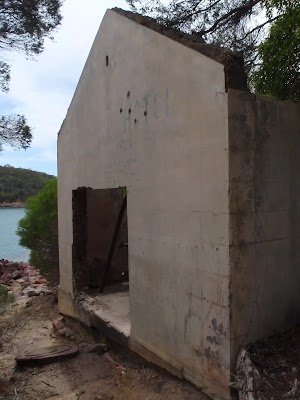
Bittangabee Storehouse ruins is located on the shore of Bittangabee Bay, near the campground, in Ben Boyd National Park. The concrete structure was built by Albert Aspinall (1839 – 1903) in 1881. The building was used to store material unloaded from ships onto a wooden jetty built at the same time. Aspinall then built a wooden tramway to move material and supplies to Green Cape to help in the construction of the lighthouse. The building is now a basic shell, missing roof, windows and a door. The concrete foundations of the timber wharf are still visible. Unfortunately, the building has been marred by graffiti, but is still worth the visit. More info.
(22.77km) Int. Light to Light Trk and Bittangabee Storehouse Trk → Int. Light to Light Trk and Bittangabee Storehouse Trail
90 m
2 mins
0m
-8m
Moderate track
Veer right: From the intersection, this walk follows the arrow into the bush, keeping the bay below on the left. The track winds through the bush to a signposted intersection.
(22.86km) Int. Light to Light Trk and Bittangabee Storehouse Trail → Bittangabee Sth Headland Lookout
150 m
3 mins
6m
0m
Moderate track
Turn right: From the intersection, this walk follows the ‘Walking Track’ sign and arrow posts up the hill. The track winds through the heath and melaleuca for a short time, passing near the campsite (on the right) while following the arrow markers. The track leads closer to the sea on the left, to a clearing overlooking a rock shelf below at the sea and the mouth of Bittangabee Bay.
Southern Bittangabee Point lookout
Southern Bittangabee Point lookout is an unofficial lookout on the southern headland forming the entrance to Bittangabee Bay in Ben Boyd National Park. The lookout is not fenced or signposted and does not have any facilities. The lookout provides a view across the mouth of Bittangabee Bay and a short way down the coast to the south. There is also a view of the red rock platform below, forming a picturesque contrast with the ocean on sunny days.
(23.01km) Bittangabee Sth Headland Lookout → Int. Light to Light Walk and Pulpit Rock Rd Access
3.8 km
1 hr 10 mins
99m
-62m
Moderate track
Continue straight: From the intersection, this walk follows the arrow markers around the headland, keeping the ocean to the left and the camping area to the right. The track soon comes to a set of wooden stairs. The walk heads down these stairs into the creek bed, and then up the stairs on the other side.
Continue straight: From the top of the stairs, this walk leads upstream of the creek, which is below on the right. The track follows this creek for some time, tending left away from it into the bush at times. The track winds slightly uphill for a while, then winds downhill to cross the rocky surface of another creek. The track heads up the hill and over the ridge before heading down to another creek bed. The track then leads up the hill to the cul-de-sac of a service trail.
Continue straight: From the top of the stairs, this walk leads upstream of the creek, which is below on the right. The track follows this creek for some time, tending left away from it into the bush at times. The track winds slightly uphill for a while, then winds downhill to cross the rocky surface of another creek. The track heads up the hill and over the ridge before heading down to another creek bed. The track then leads up the hill to the cul-de-sac of a service trail.
(26.83km) Int. Light to Light Walk and Pulpit Rock Rd Access → Int. Light to Light Trk and Pulpit Rock Rd
260 m
4 mins
6m
-2m
Moderate track
Continue straight: From the intersection, this walk follows the track markers up the hill to a signposted intersection.
Veer right: From the intersection, this walk follows the track marker along the hillside, keeping the ocean on the left of the track. The track passes a few overgrown service trails on either side, as it continues on to the signposted intersection with the main service trail.
Veer right: From the intersection, this walk follows the track marker along the hillside, keeping the ocean on the left of the track. The track passes a few overgrown service trails on either side, as it continues on to the signposted intersection with the main service trail.
(27.09km) Int. Light to Light Trk and Pulpit Rock Rd → Pulpit Rock
700 m
14 mins
3m
-49m
Hard track
Turn left: From the intersection, this walk follows none of the signs but instead heads down the hill towards the sea. The track winds down through the heath to the one-way car park and toilet. The walk continues through to the far side of the car park, where there is a fenced lookout over the rocks.
Continue straight: From the intersection, the walk heads down the stairs just near the lookout. The stairs lead onto the rock shelf, with stunning views to the north (left) and of waves crashing onto the rocks below. At the end of this side trip, retrace your steps back to the main walk then Turn left.
Continue straight: From the intersection, the walk heads down the stairs just near the lookout. The stairs lead onto the rock shelf, with stunning views to the north (left) and of waves crashing onto the rocks below. At the end of this side trip, retrace your steps back to the main walk then Turn left.
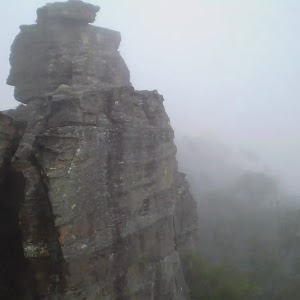
Pulpit Rock

Pulpit Rock is a large rock platform on the south-east coast of NSW, between Green Cape and Bittangabee in Ben Boyd National Park. The rock platform is a popular spot for rock fishing. Pulpit Rock is accessed via a staircase near the end of a service trail off Green Cape Rd. Near the car park is a pit toilet and garbage facilities. From the rock platform, there are great views north up the coast, with the red rock cliffs providing a spectacular highlight.
(27.09km) Int. Light to Light Trk and Pulpit Rock Rd → Ly-ee-moon Graveyard
2.8 km
49 mins
44m
-70m
Moderate track
Continue straight: From the intersection, this walk follows the sign to ‘Green Cape Lighthouse 2.5km’ keeping the ocean on the left of the track. The track meanders through the heath, then turns left and slowly head down through the heath. The track leads to an arrow-marked intersection with a badly overgrown service trail, on both sides of the track.
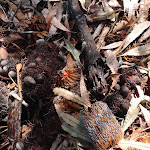
Continue straight: From the intersection, this walk heads through the heath following the arrow marker, and keeping the ocean on the left of the track. The track leads through the heath and Banksias for a short time, coming to a slightly overgrown service trail.
Continue straight: From the intersection, this walk keeps the ocean on the left of the track as it winds through the heath and the Banksias. The track soon becomes surrounded by melaleuca trees, which have many fallen branches. The track continues to a signposted intersection for ‘Ly-ee-moon Cemetery’.
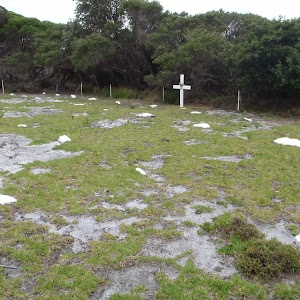
Ly-ee-moon Graveyard
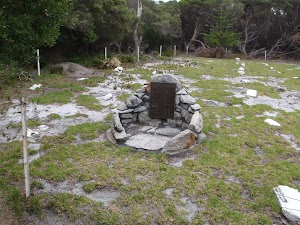
The Ly-ee-moon Graveyard is a stark reminder of the horrific accident on the night of May 31st, 1886, when 71 men, women and children lost their lives. The white stone and single cross marks the positions of the unnamed graves. The nearby plaque names the people who lost their lives – sadly some names where not known and these people are remembered only by comments such as ‘one who had a German accent’.
During the dark night, the lighthouse keeper and assistant heroically rescued 16 people from the sea, and were left to listen to cries for help though the night of other people who could not be saved. The mother of Blessed Mary MacKillop, the first Australian to be beatified by the Catholic church, was one of those lost during the night.
The fast and normally reliable ship, operated by the Australian Steam Navigation Company, was a single screw ship converted from a paddle steamer when it was brought to Australia in 1876. The graveyard is about 300m north-west of the Green Cape lighthouse, which was operational at the time the SS Ly-ee-moon struck the reef and sunk. More info.
(29.86km) Ly-ee-moon Graveyard → Green Cape Lighthouse Car park
250 m
4 mins
5m
-3m
Easy track
Veer right: From the intersection, this walk follows the arrow marker through the melaleuca trees, away from the ‘Ly-ee-moon Cemetery’ sign (behind on the left). The track winds through the trees for a short time, to open out onto the clearing of the Green Cape Lighthouse car park. The walk continues to the far end of the car park where there are signs.
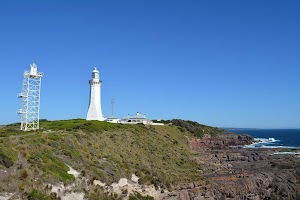
Green Cape
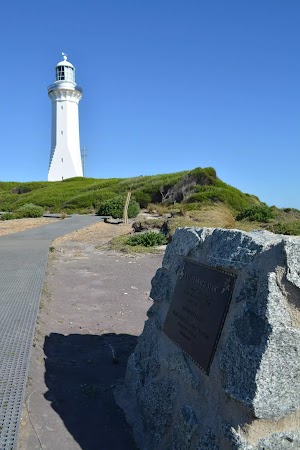
Green Cape is a headland at the southern end of Ben Boyd National Park, forming the northern head of Disaster Bay. The cape’s traditional owners are the people of the Yuin nation, from whom there remains evidence of a number of camps in the area. The cape was named ‘Green Point’ by Matthew Flinders in 1798. The area began its notorious fame in 1802 when eight of Flinders’ crew disappeared when fetching water, in what he then appropriately named ‘Disaster Bay’. The Imlay brothers and Boyd both established whaling business in the area in the early to mid 1800’s, leaving several buildings in the park. There were many shipwrecks in the surrounding waters, the most famous being the SS Ly-ee-moon, whose victims are buried on the cape. The most visible feature on the cape is the 29-metre high lighthouse that is still operational today. NPWS run 1-hour tours of the site based on bookings . There is a composting toilet at the car park at the end of Green Cape Road. Accommodation is also available in the renovated lighthouse keeper cottages.
(30.1km) Green Cape Lighthouse Car Park → Enjoying Green Cape int.
50 m
1 mins
0m
-2m
Easy track
Continue straight: From the dirt car park[16] at the end of Green Cape Lighthouse Rd, this walk leads past the manual park entry fees station[17] to then turn right following the ‘Walkway to Lighthouse’ sign[18] along the boardwalk, gently uphill. The walk leads past the ‘toilet’ sign[19] and continues along the boardwalk (now with handrail[20]) to come to a 3-way intersection and a large sheltered ‘Enjoying Green Cape’ information sign[21].
(30.15km) Enjoying Green Cape int. → Green Cape Lighthouse Telegraph Station
40 m
1 mins
0m
0m
Easy track
Continue straight: From the intersection, this walk heads uphill along the boardwalk[22] (between the two handrails) to the ‘Get the message’ information sign[23]. The path now follows ‘lighthouse 200m’ sign[24] and the fence line for another 20m to come beside the white ‘Signal Flag Locker’ building and signpost[25]. This is the site of the old Green Cape Lighthouse Telegraph Station[26].
Green Cape Telegraph Station

Green Cape Telegraph Station was established in 1882. The station acted as a relay station, re-sending ship-to-shore messages from boats passing by. Ships, and communication staff on Green Cape, would use semaphore flags to communicate a message. When required, the messages could also be relayed using Morse code. The telegraph station is a white concrete building with a tin roof. The building has a blue painted base and is less than 100m north of Green Cape Lighthouse in Ben Boyd National Park.
Cape Lighthouse Keepers
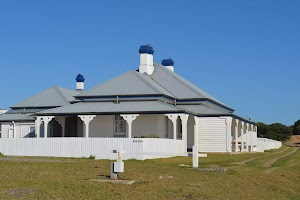
The Cape Lighthouse Keepers’ cottages is a large concrete building near Green Cape Lighthouse in Ben Boyd National Park. There are two cottages that have been refurbished, each sleeping up to 6 guests and boasting 3.5 stars. Each cottage has a fully equipped kitchen, dining room, bathroom, lounge room (with sofa bed), Master bedroom (Queen) and second bedroom (2 singles). The price starts from $250 a night per cottage. Bookings are essential, for more info call NPWS on 13000 72757 or online
(30.19km) Green Cape Lighthouse Telegraph Station → Green Cape Lighthouse entry gate
180 m
3 mins
0m
-3m
Easy track
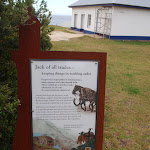
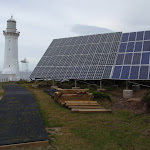
Continue straight: From beside the Telegraph Station, this walk follows the boardwalk along the fenceline, downhill towards the lighthouse[28]. After about 50m the path leads to a ‘Jack of all trades’ sign[29] and a section of 20m of hand railing either side of the path[30]. The path now leads uphill for about 45m to pass the large solar panel array[31] where the walk heads down for another 60m to come to a ‘no entry’ gate[32] beside the Green Cape Lighthouse tower[33].
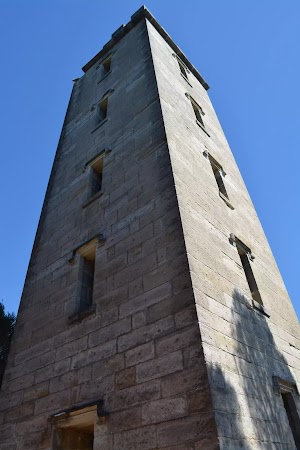
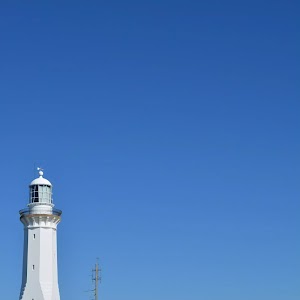
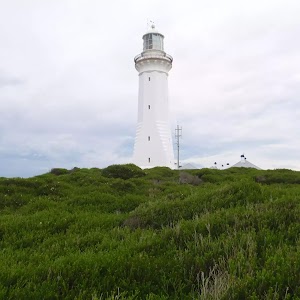
Green Cape Lighthouse
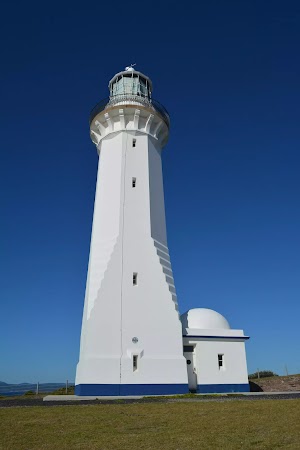
Green Cape Lighthouse is a majestic, 29 meter tall, white octagon-shaped, concrete and blue stone monolith, at the southern tip of Ben Boyd National Park. The lighthouse construction was tendered in 1880 and Albert Aspinall started construction in 1881. He built a timber tram line from Bittangabee Bay to transport materials. After having to dig footing much deeper than expected, in addition to dealing with workers’ disputes, Aspinall went broke and his creditors completed the project. The original lantern was oil-fired and was visible 19NM out to sea. Today, the lighthouse still operates with a solar-powered electric light. The lighthouse buildings and grounds can be visited on a tour, otherwise enjoyed from outside the fence. The lighthouse was functionally replaced with a more modern metal tower 60m down the hill in 1992.
(30.36km) Green Cape Lighthouse entry gate → Green Cape Lookout
150 m
3 mins
0m
-11m
Easy track
Continue straight: From the gate[34] beside the Green Cape Lighthouse tower[35], this walk leads downhill along the boardwalk, keeping the lighthouse to the left and immediately passing small seat

. After about 25m the fence leaves the path (there is a picnic table

about 30m over the grass to the left[36]), where the walk continues downhill along the boardwalk[37] for another 45m

to come beside large white metal tower[38]. This tower has been the official lighthouse since 1992 .
Continue straight: From the modern lighthouse tower, this walk follows the boardwalk[40] downhill around the metal tower. Ater about 15m the walk leads past the ‘Wildlife navigates the coast safely’ information sign[41], then continues mostly downhill for another 70m to the fenced lookout.
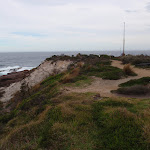
Green Cape Lookout
The lookout at the point of Green Cape, at the southern end of Ben Boyd National Park, provides great views out to sea and along the coast. On the right, the view extends across Disaster Bay to Nadgee Nature Reserve[42] and down into Victoria. To the left, there are views north along rugged sea cliffs[43] and views of Green Cape Lighthouse and accommodation[44]. An information sign at the lookout tells some of the story of the Ly-ee-moon tragedy[45]. The lookout platform is fenced (1.07m high). There are no seats at the lookout.
(30.51km) Green Cape Lookout → Green Cape Lighthouse Car Park
410 m
8 mins
16m
0m
Easy track
Turn around: From the lookout, this walk follows the boardwalk, mostly uphill for about 70m to ‘Wildlife navigates the coast safely’ information sign[46]. The walk continues up towards the lighthouses to come beside the large metal tower, the modern lighthouse for the area since 1992.
Continue straight: From the metal lighthouse tower, this walk follows the boardwalk
Continue straight: From the metal lighthouse tower, this walk follows the boardwalk
gently uphill for about 45m to come to the corner of the fence for the original Green Cape Lighthouse tower[47] (there is a picnic table
about 30m over the grass to the right[48] here). The walking continues along the boardwalk for another 25m to the gate[49] beside the Green Cape Lighthouse tower[50].
Continue straight: From the gate, the walk heads up the hill towards the large solar panels[51]. This walk keeps the houses and fence on the right undulates along the fence line to come to the signposted ‘Signal Flag Locker’ building[52] at the old ‘Telegraph Station’.
Continue straight: From the beside the Green Cape Lighthouse Telegraph Station[53], this walk follows the fence (keeping the fence and clearing to the right) along the boardwalk as it winds into the heath to then find a 3-way intersection and a large sheltered ‘Enjoying Green Cape’ information sign[54].
Continue straight: From the intersection, this walk heads gently downhill along the boardwalk with a handrail as it winds down to the dirt car park[55] at the end of Green Cape Lighthouse Rd.
Maps for the Light to Light Walk 2 days walk
You can download the PDF for this walk to print a map.
These maps below cover the walk and the wider area around the walk, they are worth carrying for safety reasons.
| Narrabarba | 1:25 000 Map Series | 88232N NARRABARBA | NSW-88232N |
| Kiah | 1:25 000 Map Series | 88231S KIAH | NSW-88231S |
| Eden | 1:25 000 Map Series | 88231N EDEN | NSW-88231N |
| Green Cape | 1:100 000 Map Series | 8923 GREEN CAPE | 8923 |
| Eden | 1:100 000 Map Series | 8823 EDEN | 8823 |
Cross sectional view of the Light to Light Walk 2 days bushwalking track

Analysis and summary of the altitude variation on the Light to Light Walk 2 days

Daily actual walking time estimates
| Day | Walking Time | Length |
|---|---|---|
| 1 | 5 hrs 52 mins | 18.6 km |
| 2 | 4 hrs 15 mins | 13.6 km |
Overview of this walks grade – based on the AS 2156.1 – 2001
Under this standard, a walk is graded based on the most difficult section of the walk.
| Length | 30.9 km | ||
| Time | 2 Days | ||
| . | |||
| Grade 4/6 Hard track |
AS 2156.1 | Gradient | Very steep (4/6) |
| Quality of track | Rough track, where fallen trees and other obstacles are likely (4/6) | ||
| Signs | Minimal directional signs (4/6) | ||
| Experience Required | No experience required (1/6) | ||
| Weather | Storms may impact on navigation and safety (3/6) | ||
| Infrastructure | Limited facilities (such as cliffs not fenced, significant creeks not bridged) (4/6) |
Some more details of this walks Grading
Here is a bit more details explaining grading looking at sections of the walk
Gradient
20km of this walk has short steep hills and another 4.8km has gentle hills with occasional steps. Whilst another 4.7km is very steep and the remaining 1.3km is flat with no steps.
Quality of track
19km of this walk follows a formed track, with some branches and other obstacles and another 11km follows a rough track, where fallen trees and other obstacles are likely. Whilst another 550m follows a clear and well formed track or trail and the remaining 520m follows a smooth and hardened path.
Signs
17km of this walk has directional signs at most intersection and another 10km has minimal directional signs. The remaining (3.9km) is clearly signposted.
Experience Required
This whole walk, 31km requires no previous bushwalking experience.
weather
Around 28km of this walk is not usually affected by severe weather events (that would unexpectedly impact safety and navigation), whilst the remaining 3.2km is affected by storms that may impact your navigation and safety.
Infrastructure
15km of this walk has limited facilities (such as not all cliffs fenced) and another 13km has limited facilities (such as cliffs not fenced, significant creeks not bridged). The remaining (3km) is close to useful facilities (such as fenced cliffs and seats).
Similar walks
A list of walks that share part of the track with the Light to Light Walk 2 days walk.
110 m Return
10 mins
Hard track

180 m Return
5 mins
Moderate track

490 m Return
30 mins
Easy track

582 m Return
15 mins
Very easy


715 m Circuit
20 mins
Hard track

764 m Return
20 mins
Very easy

826 m Return
30 mins
Easy track


954 m Return
30 mins
Moderate track

1.1 km Circuit
30 mins
Moderate track

1.8 km Return
45 mins
Moderate track

3.3 km Return
1 hr 30 mins
Moderate track

3.8 km One way
1 hr 30 mins
Hard track

4.9 km Return
2 hrs
Hard track

5.2 km Return
2 hrs
Hard track


5.3 km One way
2 hrs
Hard track

8.5 km One way
3 hrs
Hard track

8.5 km Return
3 hrs
Hard track

8.5 km Return
3 hrs
Hard track

8.8 km Return
3 hrs 30 mins
Hard track

9.1 km One way
3 hrs 30 mins
Hard track


9.1 km Return
3 hrs 30 mins
Hard track


9.3 km Return
3 hrs 30 mins
Hard track

9.8 km Return
3 hrs 30 mins
Hard track

13.4 km One way
5 hrs
Hard track

18.3 km Return
7 hrs
Hard track

30.9 km One way
3 Days
Hard track

Other Nearby walks
A list of walks that start near the Light to Light Walk 2 days walk.
702 m Return
20 mins
Hard track

1.1 km Circuit
30 mins
Moderate track

52 m Return
10 mins
Easy track

1.4 km Return
30 mins
Easy track

4.8 km Return
2 hrs
Hard track

360 m Return
15 mins
Hard track

1.1 km Return
30 mins
Moderate track

316 m Return
10 mins
Moderate track

471 m Circuit
15 mins
Moderate track

3.5 km One way
1 hr 15 mins
Hard track

2.3 km Return
45 mins
Hard track

124 m Return
5 mins
Very easy

Plan your trip to and from the walk here
The Light to Light Walk 2 days walk starts at the Ben Boyd Car park information sign (gps: -37.104513, 149.95119)
Your main transport option to Ben Boyd Car park information sign is by;
![]() Car. A park entry fee is required for driving into the park.
Car. A park entry fee is required for driving into the park.
(get details)
The Light to Light Walk 2 days ends at the Green Cape Lighthouse Car Park (gps: -37.259525, 150.04796)
Your main transport option to Green Cape Lighthouse Car Park is by;
![]() Car. A park entry fee is required for driving into the park.
Car. A park entry fee is required for driving into the park.
(get details)


Short URL = http://wild.tl/ltlw2d
Gallery images
There are other downloads I am still working on.
You will probably need to login to access these — still all free.
* KML (google earth file)
* GPX (GPS file)
Special Maps/ brochures
* A3 topo maps
* PDF with Lands Topo map base
* PDF with arial image (and map overlay)
I wanted to get the main site live first, this extra stuff will come in time.
Happy walking
Matt 🙂
248 Track
248 Track

3 hrs 15 mins
8.3 km Return
255 m
Moderate track


(0km) Int of Ironbark Rd and Popran Pipeline Trail → Ironbark Rd picnic area
1.7 km
35 mins
88m
-19m
Easy track
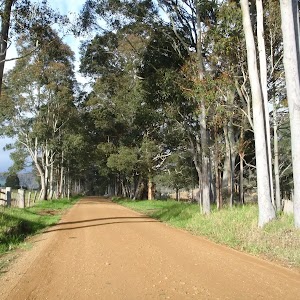
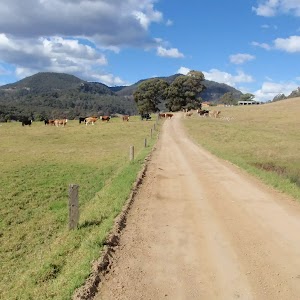
Starting from the car park at the end of the ‘Pipeline Trail’, the walk follows the gravel Ironbark Rd south, initially keeping the ‘Pipeline Trail’ gate to your left (not following the ‘Pipeline Trail’). The gravel road passes between some houses with prominent ‘private property’ signs so stick to the road along here. The walk eventually comes to the car park and picnic area at the end of the road. Vehicles with reasonable ground clearance could be driven along this section, to the car park at the end of the road.
Ironbark Rd Picnic area
This picnic area is located at the end of Ironbark Rd, on the edge of Popran National Park. While this is not a special spot for a picnic, there are good facilities if you are doing a walk in the area. There is a picnic table, pit toilet (with a small rainwater tank for handwashing), information signs and track arrows at this point. Some of the tracks starting from this point are also horse trails. A section of Ironbark Rd may not be suitable for 2WD vehicles so you may have to walk the last section of road.
(1.7km) Ironbark Rd picnic area → Int of Mt Olive trail and 248 Trail
310 m
6 mins
10m
-10m
Easy track
Continue straight: From the car park, the walk passes around a gate and follows the management trail down the hill and soon arrives at the intersection marked with ‘Mt Olive’ and the ‘248 Trail’.
(2.01km) Int of Mt Olive trail and 248 Trail → Top of Mt Olive
210 m
5 mins
22m
-2m
Hard track
Turn left: From the intersection, the walk follows the ‘Mt Olive’ arrow along the management trail for a very short distance before reaching an intersection with a bush track signposted for ‘Mt Olive’.
Turn left: From the intersection, the walk follows the ‘Mt Olive’ signpost along the bush track. The walk meanders for a while before reaching an intersection with another bush track.
Turn left: From the intersection, the walk follows the bush track steeply up the hill and soon arrives at the top of Mt Olive. At the end of this side trip, retrace your steps back to the main walk then Turn left.
Mt Olive
Mt Olive is a low rising hill in Popran National Park. The views from the top, across the surrounding national park, in all directions, are very nice. The nice cliffs around the base of Mt Olive also add to the scenery. There are the remnants of a couple of old trig points at the top.
(2.01km) Int of Mt Olive trail and 248 Trail → End of 248 Trail
2.1 km
41 mins
45m
-83m
Moderate track
Veer right: From the intersection, the walk follows the ‘248 Trail’ arrow along the management trail. The trail meanders for a while and descends gently before passing through the signposted ‘Donovans Forest’. After climbing from ‘Donovans Forest’ and meandering a little further, the trail arrives at the signposted intersection of the ‘Hominy Creek Trail’ and the ‘248 Trail’.
Veer right: From the intersection, the walk follows the ‘248 Trail’ arrow along the overgrown management trail, going gently up the hill. The track ends at a large rocky outcrop which is interesting to explore and has some nice views.
Veer right: From the intersection, the walk follows the ‘248 Trail’ arrow along the overgrown management trail, going gently up the hill. The track ends at a large rocky outcrop which is interesting to explore and has some nice views.
End of 248 Trail lookout
This informal lookout is located at the end of the 248 trail in Popran National Park. The lookout offers some nice views into the surrounding valleys. The rocky outcrops in the area have some nice shapes and textures. Be careful to avoid damaging some faint Aboriginal carvings on these rocks.
Maps for the 248 Track walk
You can download the PDF for this walk to print a map.
These maps below cover the walk and the wider area around the walk, they are worth carrying for safety reasons.
| Gunderman | 1:25 000 Map Series | 91313S GUNDERMAN | NSW-91313S |
| Mangrove | 1:25 000 Map Series | 91313N MANGROVE | NSW-91313N |
| Gosford | 1:100 000 Map Series | 9131 GOSFORD | 9131 |
Cross sectional view of the 248 Track bushwalking track

Analysis and summary of the altitude variation on the 248 Track

Overview of this walks grade – based on the AS 2156.1 – 2001
Under this standard, a walk is graded based on the most difficult section of the walk.
| Length | 8.3 km | ||
| Time | 3 hrs 15 mins | ||
| . | |||
| Grade 3/6 Moderate track |
AS 2156.1 | Gradient | Gentle hills with occasional steps (2/6) |
| Quality of track | Formed track, with some branches and other obstacles (3/6) | ||
| Signs | Directional signs along the way (3/6) | ||
| Experience Required | No experience required (1/6) | ||
| Weather | Weather generally has little impact on safety (1/6) | ||
| Infrastructure | Limited facilities, not all cliffs are fenced (3/6) |
Some more details of this walks Grading
Here is a bit more details explaining grading looking at sections of the walk
Gradient
Around 3.5km of this walk has gentle hills with occasional steps, whilst the remaining 600m is flat with no steps.
Quality of track
Around 3.5km of this walk follows a clear and well formed track or trail, whilst the remaining 600m follows a formed track, with some branches and other obstacles.
Signs
Around 2.1km of this walk has directional signs at most intersection, whilst the remaining 2km is clearly signposted.
Experience Required
This whole walk, 4.1km requires no previous bushwalking experience.
weather
This whole walk, 4.1km is not usually affected by severe weather events (that would unexpectedly impact safety and navigation).
Infrastructure
Around 2.1km of this walk has limited facilities (such as not all cliffs fenced), whilst the remaining 2km is close to useful facilities (such as fenced cliffs and seats).
Similar walks
A list of walks that share part of the track with the 248 Track walk.

4.4 km Return
2 hrs
Hard track

10.1 km Return
4 hrs 15 mins
Hard track

10.8 km Circuit
4 hrs 15 mins
Hard track

Other Nearby walks
A list of walks that start near the 248 Track walk.

6 km One way
2 hrs 30 mins
Hard track

21.1 km One way
8 hrs
Hard track

47.4 km One way
3 Days
Hard track

26.7 km One way
2 Days
Hard track

1.7 km Return
45 mins
Moderate track

3 km Circuit
1 hr 30 mins
Moderate track

1.7 km Circuit
1 Hr
Moderate track

2.2 km One way
1 Hr
Moderate track

1.8 km Circuit
1 Hr
Moderate track

8.1 km Circuit
3 hrs 30 mins
Moderate track

426 m Return
20 mins
Moderate track

2.3 km Circuit
1 Hr
Moderate track

Plan your trip to and from the walk here
The 248 Track walk starts and ends at the Int of Ironbark Rd and Popran Pipeline Trail (gps: -33.37159, 151.19528)
Your main transport option to Int of Ironbark Rd and Popran Pipeline Trail is by;
![]() Car. There is free parking available.
Car. There is free parking available.
(get details)
Short URL = http://wild.tl/2t
Gallery images
There are other downloads I am still working on.
You will probably need to login to access these — still all free.
* KML (google earth file)
* GPX (GPS file)
Special Maps/ brochures
* A3 topo maps
* PDF with Lands Topo map base
* PDF with arial image (and map overlay)
I wanted to get the main site live first, this extra stuff will come in time.
Happy walking
Matt 🙂
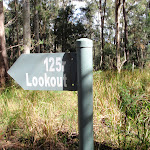
Georges Road Rest Area to 125r Lookout
Georges Road Rest Area to 125r Lookout

3 hrs 30 mins
4.4 km Return
209 m
Moderate track
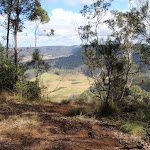
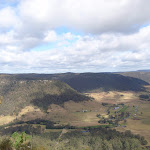
This return walk starts from a nice rest area on Georges Road and follows the road along the ridge, passing several great lookout points across the valley, to the quiet little 125r lookout, which provides a nice open clearing that just screams lunch time. Please note that Watagan and Georges Roads are dry weather roads only, if you are unsure, check with the park office before heading out. This walk can be made shorter by driving further along Georges Rd.


Great North Walk Rest Area

This is a small rest area on the side of Georges Road, providing room to rest up and for a small campfire. There are also some nice views through the trees but be careful as this rest area is near a steep drop.
(0km) Northern rest area → Top of the 125r Lookout trail
1.3 km
31 mins
68m
-76m
Moderate track
From the clearing, this walk follows Georges Road, initially keeping the views on your right. The walk leads downhill for a few hundred metres, then notably becomes moderately steep downhill for another 400m before flattening to cross a wide saddle. On the other side of the saddle, this walk leads uphill for about 400m, then the track flattens out and bends right to come to a three-way intersection[1], with the signposted ‘125r Lookout’ trail (on the left).
(1.32km) Top of the 125r Lookout trail → 125r Lookout Rest Area
860 m
17 mins
15m
-50m
Moderate track
Maps for the Georges Road Rest Area to 125r Lookout walk
You can download the PDF for this walk to print a map.
These maps below cover the walk and the wider area around the walk, they are worth carrying for safety reasons.
| Quorrobolong | 1:25 000 Map Series | 91322S QUORROBOLONG | NSW-91322S |
| Cessnock | 1:50 000 Map Series | 91322 CESSNOCK | CW-91322 |
| Cessnock | 1:100 000 Map Series | 9132 CESSNOCK | 9132 |
Cross sectional view of the Georges Road Rest Area to 125r Lookout bushwalking track

Analysis and summary of the altitude variation on the Georges Road Rest Area to 125r Lookout

Overview of this walks grade – based on the AS 2156.1 – 2001
Under this standard, a walk is graded based on the most difficult section of the walk.
| Length | 4.4 km | ||
| Time | 3 hrs 30 mins | ||
| . | |||
| Grade 3/6 Moderate track |
AS 2156.1 | Gradient | Short steep hills (3/6) |
| Quality of track | Clear and well formed track or trail (2/6) | ||
| Signs | Directional signs along the way (3/6) | ||
| Experience Required | No experience required (1/6) | ||
| Weather | Weather generally has little impact on safety (1/6) | ||
| Infrastructure | Limited facilities, not all cliffs are fenced (3/6) |
Some more details of this walks Grading
Here is a bit more details explaining grading looking at sections of the walk
Gradient
Around 1.3km of this walk has short steep hills, whilst the remaining 860m has gentle hills with occasional steps.
Quality of track
This whole walk, 2.2km follows a clear and well formed track or trail.
Signs
This whole walk, 2.2km has directional signs at most intersection.
Experience Required
This whole walk, 2.2km requires no previous bushwalking experience.
weather
This whole walk, 2.2km is not usually affected by severe weather events (that would unexpectedly impact safety and navigation).
Infrastructure
This whole walk, 2.2km has limited facilities (such as not all cliffs fenced).
Similar walks
A list of walks that share part of the track with the Georges Road Rest Area to 125r Lookout walk.
17.2 km One way
7 hrs
Hard track

29.7 km One way
2 Days
Hard track

60.5 km One way
4 Days
Hard track

Other Nearby walks
A list of walks that start near the Georges Road Rest Area to 125r Lookout walk.
12.5 km One way
6 hrs
Hard track

8.1 km One way
4 hrs
Hard track

5.6 km Circuit
2 hrs 30 mins
Hard track


2.5 km Circuit
1 Hr
Hard track


718 m Circuit
30 mins
Moderate track


516 m Return
15 mins
Moderate track


4.3 km One way
2 hrs
Hard track

13.8 km One way
5 hrs
Hard track

14.8 km One way
6 hrs
Hard track


1.5 km Return
1 Hr
Moderate track


1.7 km Return
1 Hr
Hard track


406 m Return
30 mins
Hard track

Plan your trip to and from the walk here
The Georges Road Rest Area to 125r Lookout walk starts and ends at the Northern rest area (gps: -32.973467, 151.34537)
Your main transport option to Northern rest area is by;
![]() Car. There is free parking available.
Car. There is free parking available.
(get details)
Short URL = http://wild.tl/grrat1l
Gallery images
There are other downloads I am still working on.
You will probably need to login to access these — still all free.
* KML (google earth file)
* GPX (GPS file)
Special Maps/ brochures
* A3 topo maps
* PDF with Lands Topo map base
* PDF with arial image (and map overlay)
I wanted to get the main site live first, this extra stuff will come in time.
Happy walking
Matt 🙂
27Mhz (AM) CB frequency table
 Australia has two main types of CB or Citizen Band radio. This articles lists the channels and frequencies used by the AM or 27MHz type. This is the cheapest type of CB available and used for long distance communications.
The 27Mhz frequency table is below. Don’t forget that on the AM band same radio have the choice of use of single side band technology. Generally speaking most people use the both side bands in normal AM mode.
| Channel | Freq (MHz) | Use |
| 1 | 26.965 | |
| 2 | 26.975 | |
| 3 | 26.985 | |
| 4 | 27.005 | |
| 5 | 27.015 | |
| 6 | 27.025 | |
| 7 | 27.035 | |
| 8 | 27.055 | Road contact |
| 9 | 27.065 | Emergency Calling only |
| 10 | 27.075 | |
| 11 | 27.085 | General Call (IE contact then find another channel) |
| 12 | 27.105 | |
| 13 | 27.115 | |
| 14 | 27.125 | |
| 15 | 27.135 | |
| 16 | 27.155 | General call for Side Band (LSB) |
| 17 | 27.165 | |
| 18 | 27.175 | |
| 19 | 27.185 | |
| 20 | 27.205 | |
| 21 | 27.215 | |
| 22 | 27.225 | |
| 23 | 27.245 | |
| 24 | 27.235 | |
| 25 | 27.255 | |
| 26 | 27.265 | |
| 27 | 27.275 | |
| 28 | 27.285 | |
| 29 | 27.295 | |
| 30 | 27.305 | |
| 31 | 27.315 | |
| 32 | 27.325 | |
| 33 | 27.335 | |
| 34 | 27.345 | |
| 35 | 27.355 | |
| 36 | 27.365 | |
| 37 | 27.375 | |
| 38 | 27.385 | |
| 39 | 27.395 | |
| 40 | 27.405 | |
12 Best day walks in the Blue Mountains
The Blue Mountains is was of the most ancient landscapes, providing amazing opportunity to discover waterfalls, caves, canyons and views that go on forever. Explore the ridge top views or wander into the steep valleys. There is good public transport to many walks, and plenty of good food and accommodation allowing you to stay for longer. Happy Walking.
5.4 km Circuit
3 hrs 30 mins
Hard track

7.9 km Return
5 hrs
Hard track

844 m Circuit
30 mins
Moderate track

4.6 km Circuit
3 hrs 30 mins
Hard track

6.8 km Return
3 hrs 15 mins
Hard track

5.6 km Return
2 hrs
Moderate track

1.5 km Return
1 hr 30 mins
Hard track


4.8 km Circuit
3 hrs
Hard track

18.2 km Circuit
8 hrs 30 mins
Hard track

10.5 km Circuit
4 hrs 15 mins
Hard track

6.8 km One way
3 hrs 30 mins
Moderate track


12.6 km Return
5 hrs 30 mins
Hard track

Bushwalks in the Sydney Region : Volume 2
Title: Bushwalks in the Sydney Region : Volume 2
Author: Ed: Stephen Lord,Ed: George Daniel
Edition: 4
Publisher: National Parks Association of New South Wales Inc
ISBN: 0975741608
Number of pages: 164
Year of Publication: 2006
Cover Price (au$): 26.95
Format: Paperback
Website: http://www.npansw.org.au/website/index.php?option=com_wrapper&Itemid=418
Weight (grams): 305
Regions the book covers: Sydney and surrounds
Height (cm): 25
Subjects:
Hiking -- New South Wales -- Sydney Region -- Guidebooks,Sydney Region (N.S.W.) -- Guidebooks
Authors Comments:
THESE BOOKS (vols 1&2) are the results of the efforts of volunteers to produce two new walks books which would describe interesting walks in the Sydney region and raise funds for NPA.
THE SYDNEY REGION: Nominated as an area within 110km radius from Sydney. It includes:- Frazer Park to the N – Glen Davis to the NW – Jenolan Caves & Kanangra Walls to the W – Yerranderie to the SW – and the Northern Part of Morton NP & [nr] Nowra in the SSW.
THE WALKS are generally those not covered by other walks books however some classic walks are included such as Valley of the Waters and Blue Gum Forest. There are some walks that have not previously been described. Volume 1 has 93 walks and Volume 2 has 80 walks.
THE MAPS are of 1:25000 scale which we considered the minimum for the detail required. Most one day walks fit on a single page map. [The small pocket sized book philosophy was just not good enough]. All maps have True North up and include a compass variation/bearing aid diagram. All maps have a key included. All maps show km guide marks along the route. Spot heights are shown (in metres above sea level) at significant places. Most maps are within 1 page of their respective walk descriptions. Rivers and creeks have direction of flow shown. All maps are in two colours. In many cases the maps and track notes will save having to obtain NP&WS pamphlets, or other maps.
THE TRACK NOTES (DESCRIPTIONS). By using several techniques, we fit more text per page than other similar sized books. The notes give directions for getting to starting point of each walk; they also mention where to obtain water, where navigation care is required, (with detailed help), point out where hazards are, and even mention good places to stop for lunch etc.
PAPER: The books are printed on paper from sustainable forests. Book size is approx 250x175x10mm thick.
PROCEEDS, all go to support NPA projects and activities.
Niche: Many walks in Sydney and surrounding regions.
Interpretive Information: Minimal
Grade system explained: No
Ascent and/or Decent provided: Yes
Driving directions provided: Yes
Date walks last reviewed provided: No
A summary of walks provided: Yes
Regional Map of walks provided: Yes
Maps designed for walking: Yes - reasonable detail
Type of maps used (for walking): Sketch
Colour used in walking maps: Simple colour
Size of walking maps: Full page
Walking map Comment: Most walks have a unique map.
Colour depth of photos: None
Level of detail in tracknotes: Detailed route information
Alternate route and side trip suggestions: Some walks
A Guide To Bushwalking : Book 2

Title: A Guide To Bushwalking : Book 2
Author: Bernard Forshaw,Vincent Oerlemans
Edition: 1
Publisher: Cosmorama Press Company
ISBN: 090989002
Number of pages: 54
Year of Publication: 1977
Cover Price (au$): 3.00
Format: Paperback
Weight (grams): 65
Regions the book covers: Blue Mountains, Royal National Park
Height (cm): 15
Subjects:
Hiking - New South Wales
Interpretive Information: Minimal
Grade system explained: No
Ascent and/or Decent provided: No
Driving directions provided: Yes
Date walks last reviewed provided: No
A summary of walks provided: No
Regional Map of walks provided: Yes
Maps designed for walking: Yes - limited detail
Type of maps used (for walking): Sketch
Colour used in walking maps: Black and White
Size of walking maps: Full page
Walking map Comment: One full page map, and three fold-out double-page sized maps. Additional maps would be required for most walks.
Colour depth of photos: None
Level of detail in tracknotes: Detailed route information
120 walks in New South Wales
Title: 120 walks in New South Wales
Author: Tyrone Thomas
Edition: 1
Publisher: Hill of Content
ISBN: 0855722975
Number of pages: 393
Year of Publication: 2000
Cover Price (au$): 32.95
Format: Paperback
Website: http://web.archive.org/web/20041010022224/members.ozemail.com.au/~tyronet/100nsw.html
Weight (grams): 315
Regions the book covers: New South Wales
Height (cm): 18
Subjects:
Hiking -- New South Wales -- Guidebooks,New South Wales -- Guidebooks
Niche: Many walks scattered throughout NSW, including Lord Howe and Norfolk Islands
Interpretive Information: Minimal
Grade system explained: No
Ascent and/or Decent provided: No
Driving directions provided: No
Date walks last reviewed provided: Yes
A summary of walks provided: Yes
Regional Map of walks provided: No
Maps designed for walking: Yes - reasonable detail
Type of maps used (for walking): Simple Topographic
Colour used in walking maps: Greyscale
Size of walking maps: Full page
Walking map Comment: Individual maps for most walks.
Colour depth of photos: Colour
Comment on Photographs: There are a few photo plates scattered through the book.
Level of detail in tracknotes: Detailed route information
Alternate route and side trip suggestions: Some walks
Easy (Grade 2 walks)
52 m Return
10 mins
Easy track
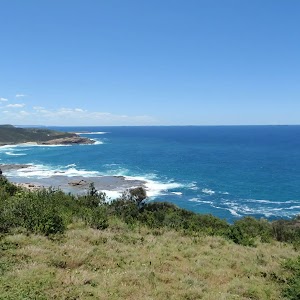
142 m Return
5 mins
Easy track

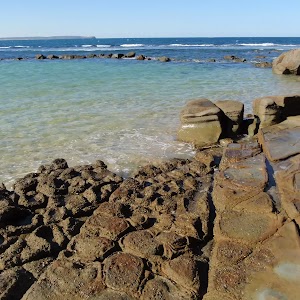
150 m Return
15 mins
Easy track


238 m Return
10 mins
Easy track


243 m Circuit
15 mins
Easy track

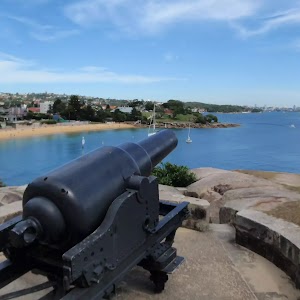
358 m Return
15 mins
Easy track

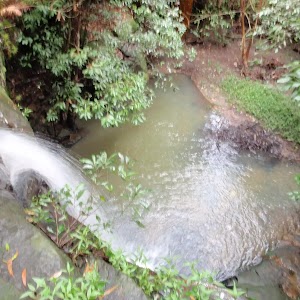
360 m Return
15 mins
Easy track

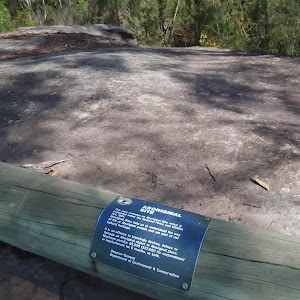
378 m Return
10 mins
Easy track

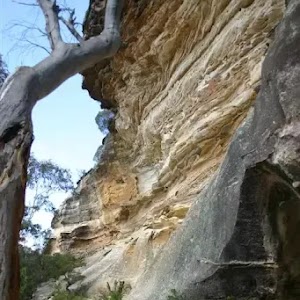
400 m Return
15 mins
Easy track

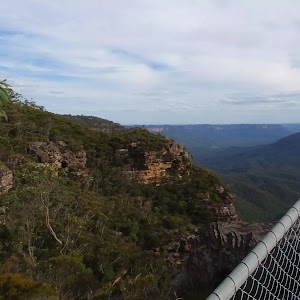
432 m Return
15 mins
Easy track

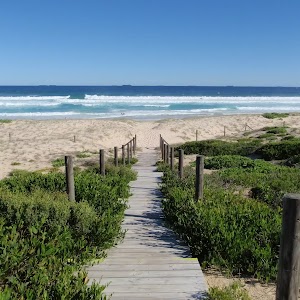
444 m Return
10 mins
Easy track

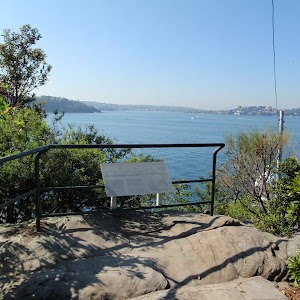
478 m Return
15 mins
Easy track

490 m Return
30 mins
Easy track
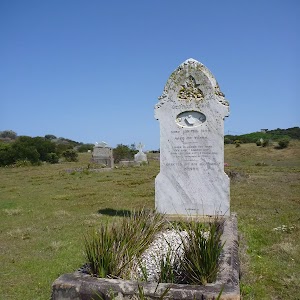
496 m Return
15 mins
Easy track

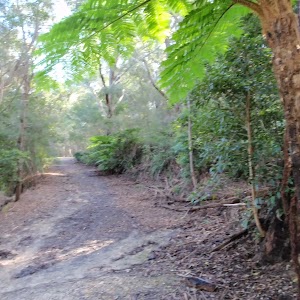
499 m One way
15 mins
Easy track

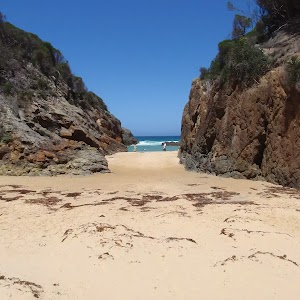
648 m Return
15 mins
Easy track

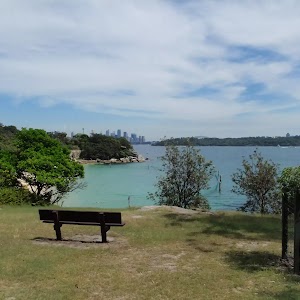
661 m Circuit
15 mins
Easy track

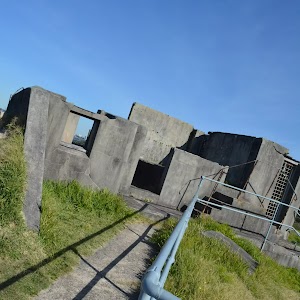
664 m Return
30 mins
Easy track


706 m Return
25 mins
Easy track


750 m Return
30 mins
Easy track

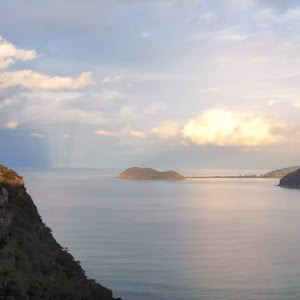
756 m Return
20 mins
Easy track

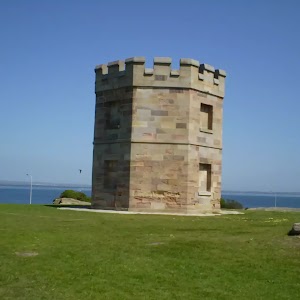
792 m Circuit
30 mins
Easy track

826 m Return
30 mins
Easy track

858 m Return
20 mins
Easy track

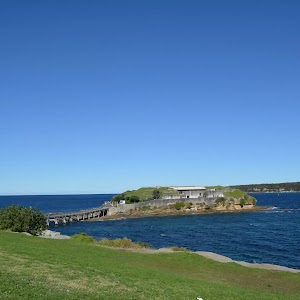
866 m Return
30 mins
Easy track

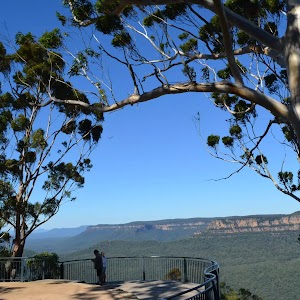
872 m Return
30 mins
Easy track

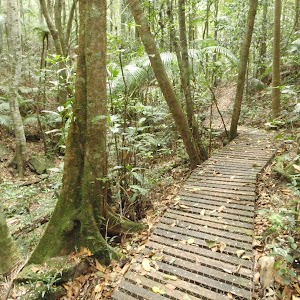
890 m Return
30 mins
Easy track

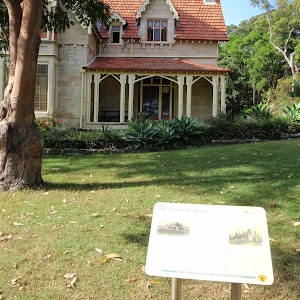
896 m Return
20 mins
Easy track

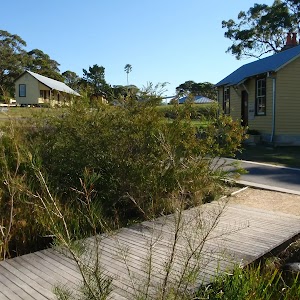
904 m Return
30 mins
Easy track

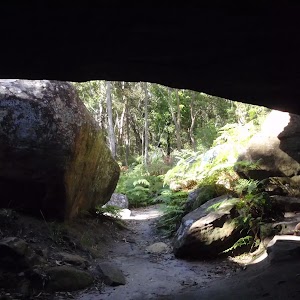
922 m Return
20 mins
Easy track

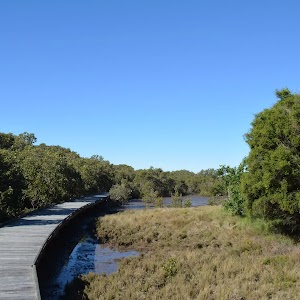
945 m One way
30 mins
Easy track

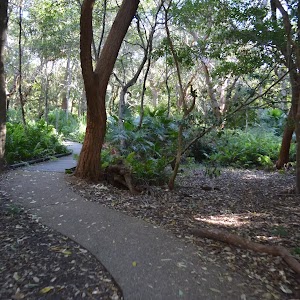
960 m Circuit
20 mins
Easy track

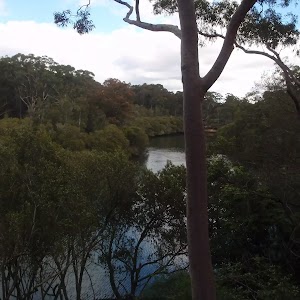
978 m Return
30 mins
Easy track

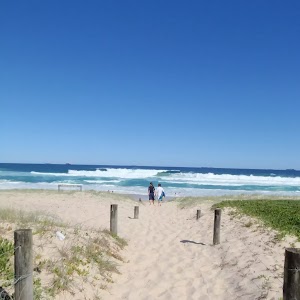
1.2 km Return
25 mins
Easy track

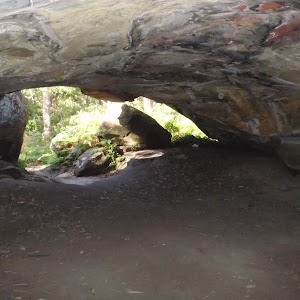
1.3 km Circuit
30 mins
Easy track

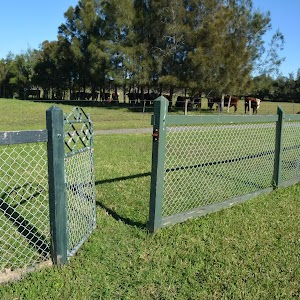
1.3 km Return
30 mins
Easy track


1.3 km Return
40 mins
Easy track

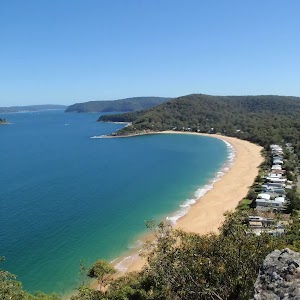
1.4 km Return
30 mins
Easy track

1.4 km Return
30 mins
Easy track

1.5 km Return
30 mins
Easy track

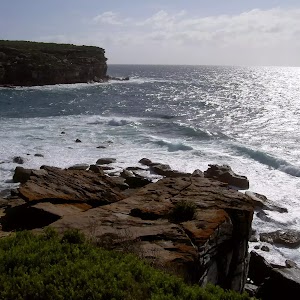
1.6 km Return
45 mins
Easy track

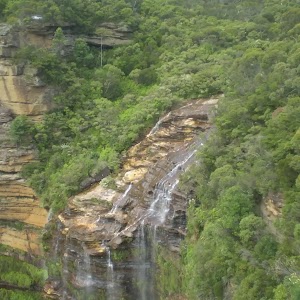
1.6 km One way
45 mins
Easy track

1.6 km Circuit
45 mins
Easy track

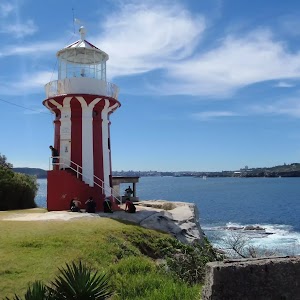
1.7 km Circuit
45 mins
Easy track

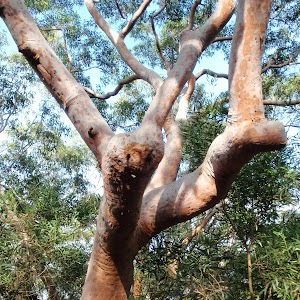
1.7 km Circuit
40 mins
Easy track

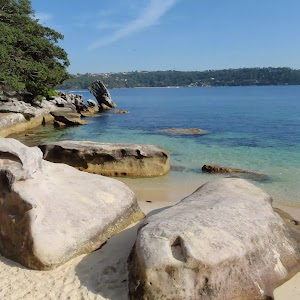
1.8 km Circuit
40 mins
Easy track

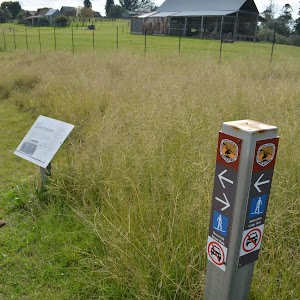
1.8 km Return
45 mins
Easy track

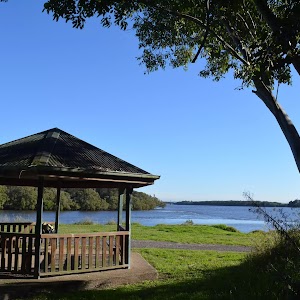
1.9 km One way
45 mins
Easy track

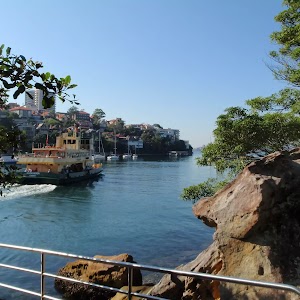
2 km One way
45 mins
Easy track

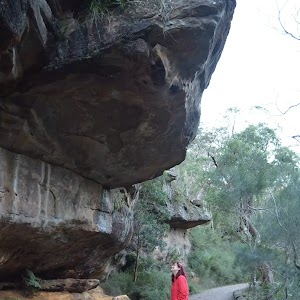
2.2 km Return
45 mins
Easy track

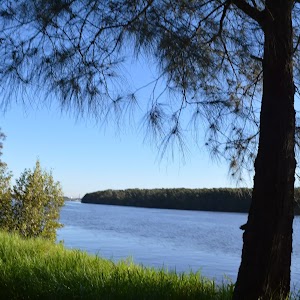
2.5 km Return
45 mins
Easy track

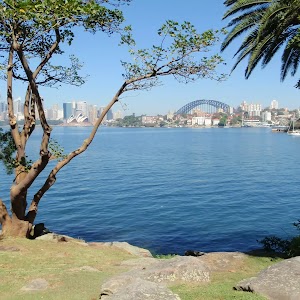
2.7 km Circuit
1 hr 15 mins
Easy track

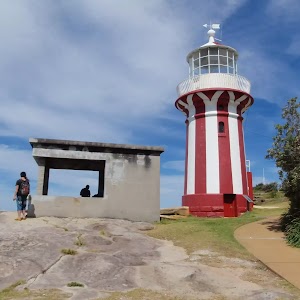
2.8 km Return
1 hr 15 mins
Easy track

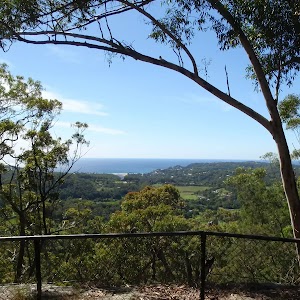
3.2 km Return
1 hr 15 mins
Easy track

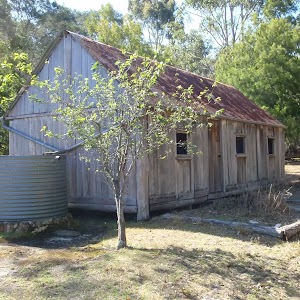
3.6 km Return
1 hr 15 mins
Easy track

5 km Return
1 hr 45 mins
Easy track

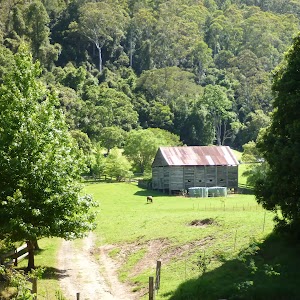
11 km One way
3 hrs 30 mins
Easy track

Community Resources
Username: User email: User level: User first name: User last name: User display name: User ID: 0
Comments