

So what is pack hauling? Is it loading a donkey, employing a Sherpa or throwing your bag over the edge to see whose bounces the most? Well it could be all of those! Out on a bushwalk it usually refers to removing your backpack to get around an obstacle.

Pack Hauling
Daniel Mitchell

38 | BWA August 2018
Pack passing
Using a rope
When might you haul packs on a bushwalk?You’re out on a bushwalk, it’s a beautiful day but has been raining, then the only way to continue is through a narrow slot, or down a slippery section of rock and logs, or to climb a steep exposed section. Scrambling over rock and climbing up or down can be difficult enough at times. Sometimes it's impossible to move up or down while carrying a pack.
Pack hauling can make it easier or possible to negotiate an obstacle. The important question is "What is the risk and the consequence of attempting to negotiate the obstacle while wearing a pack?" It may be unlikely that you would slip and fall, but if you did, what are the potential consequences of that slip? Think broken bones, concussion or worse. If you are unable to walk out it would mean organising an emergency evacuation. Let’s hope you packed that PLB!
Being free of your pack enables easier use of your limbs. Being our normal size and shape with our usual balance and centre of gravity means we can more safely negotiate
an obstacle. Especially if there is risk of overbalancing or if some of the walking party are less agile, less focused or inexperienced walking with a pack.
Pack passing/human chainThe simplest method is to form a human chain. It can be done solo or with just two people, but the more people involved the easier it is. It also adds a subtle moment where everyone works together to overcome a challenge. To do this, everyone removes their packs. The walkers position themselves across the obstacle is stable positions within reach of the next person. Then all of the packs are passed along first, with their owners following at the end. Once everyone is through, packs back on and off you go again.
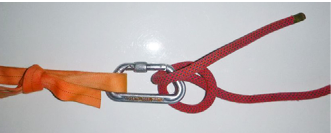
Using a ropeIf you are out on a bushwalk where you know that you will encounter difficult sections, or you’re going off-track to find your own path, it is a good idea to take along a Handline Kit. This can be used for setting up a traverse line, bush-abseil, rigging up a tarp, a gear drying line and also for creating a pack hauling system. A typical kit would include a length of rated rope, a couple of slings and three or four rated carabiners.
“What is the risk and the consequence of attempting to negotiate the obstacle while wearing a pack?
BWA August 2018 | 39
KnotsYou will need to use a few knots. Some knots are better and safer than others because they are easier to undo and don’t reduce the strength of the rope significantly. It is worth practising these too so you don’t forget! Always leave some tail (end of rope) so the knot cannot fall apart, usually 10-30 cm.
Some useful knots to learn are:
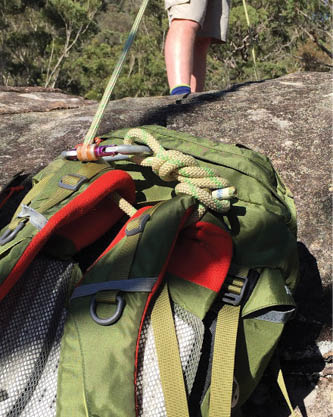
Bowline or double bowline. An "end of line" knot that creates a secure loop as large as required. Good for going around an anchor point, through several points on a pack, is easy to undo.
Clove hitch and half hitches. Used to tie around a small object such as a carabiner and to add a backup safety feature.
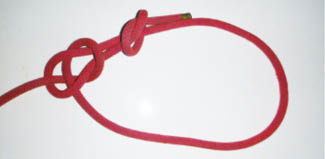
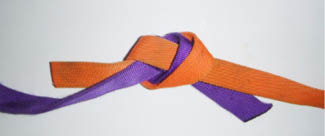
Tape or water knot. This is a simple overhand knot with the other end of the tape retracing the first knot. The most suitable choice for tape slings. 10 cm tails minimum.
French and Klemheist Prusik. Used with a Prusik sling to create an autoblock, which is an added feature to grab and backup a rope. Different styles of Prusik grab the rope in one or both directions. The French style can be
moved if still loaded/weighted (but this can also happen by accident such as dragging over a rock).
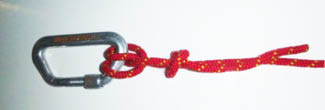
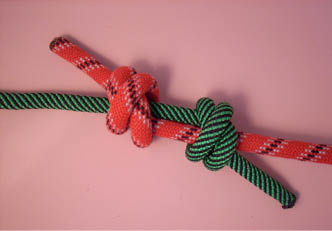
Double Fishermans. Used to create a Prusik sling for the above. Difficult or impossible to undo once it has had a significant load placed on it. 5 cm tails.
Munter or Italian Hitch. A simple knot on a carabiner that allows you to control the speed of a descent/ascent, similar to using a belay device. Note that this kinks the rope quite badly.
Simple haul systemA possible scenario is this. The first person climbs the obstacle without a pack, taking with them the handline kit. Look for a suitable anchor such as a healthy tree trunk greater than 100 mm diameter with solid roots, a
Markus Bärlocher via Wikimedia Commons
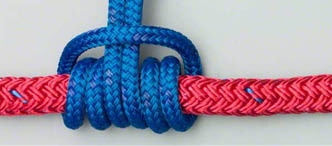
A classic Prusik knotAnimatedknots.com
Photos on this page by Stephen Lake unless otherwise mentioned
40 | BWA August 2018
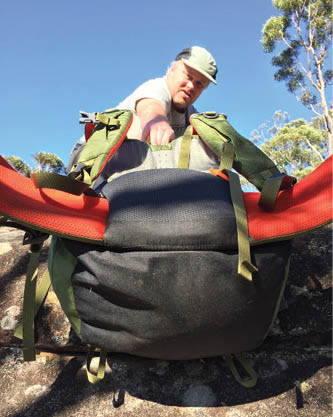
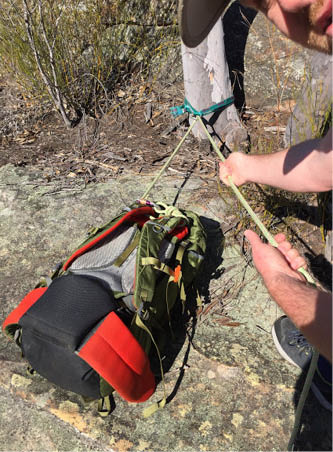
solid rock over which a sling can be passed, or a chockstone around which a sling can be threaded. Put a sling around the anchor using a Tape Knot and clip on a carabiner. Run one end of the rope through the carabiner and lower it to the person below. They secure everything in the pack and tighten all the straps to minimise snag points, then tie the rope to the pack. It is a good idea to use the haul loop which looks like a handle at the top between the shoulder straps. If possible loop it around the shoulder straps also to spread the weight over more than one point to avoid damaging the pack.
You can now pull on the tail of the rope to raise the pack. It is a good idea to hold both strands of rope when adjusting your hand position. This is easier to hold and prevents the rope slipping.
Another simple method if the rope is long enough is to pass the loose tail to the person below. This way both people can share the effort. The person above pulls up on the weighted rope while the person below pulls down on the tail simultaneously. If just the person at the top is hauling, they too can hold both the weighted rope and the tail while doing a push pull movement.
So by setting up a fairly simple system, there are a few ways you can operate the pack haul. If you were lowering the pack past an obstacle, you would set up a similar system with a person descending first to then untie the packs as they arrive. The packs would be lowered with the aid of a belay device, or by using the Munter/Italian hitch or other methods to control the descent.
Things to watch out for
Avoid standing directly below the pack being hauled, in case it drops or something falls out.
Be careful at heights and near rock edges, consider using a personal safety tether.
The big one to watch out for is the Critical Edge. It’s the point on the obstacle or rock edge that the weighted rope is dragging over. This can really damage the rope and scar the rock. It could be avoided if there was a perfect anchor directly above the obstacle, or if you can place a pad of some sort on the rock edge.
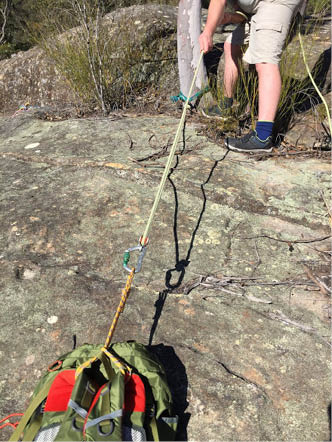
Looped rope with a pulley on pack
Simple looped rope
BWA August 2018 | 41
Each time the rope passes across something such as a carabiner there is friction. This will add effort and wear to the rope. It can be reduced by using a lightweight pulley.
Tape slings reduce or stop any damage to trees and other anchor points.
Packs may suffer abrasion or even get jammed on the way up, so choose the smoothest route for your haul system.
By adding in more points at the top of the system you improve the ratio of pull to rise, or the effort required to shift the load. This type of system is where the rope starts to zig and zag between additional points, called a Z-drag or 3:1 and going up to a 5:1 or 6:1 etc. The more returns or zigzags the rope does, the less effort is required to move the load. However, more rope is needed.
The Z-dragTo set up a Z-drag or 3:1 haul system, choose a suitably strong anchor. Attach a sling around the anchor and clip on a carabiner as above.
Pass one end of the rope through the carabiner and lower it. Next attach an
autoblock to the rope that is to be weighted. The classic way is to use a Prusik or friction knot that wraps around the main rope and prevents it moving in one direction. Here I would use a French Prusik and a second carabiner clipped to the sling beside the first carabiner.
Next take the loose tail of the rope back towards the rock edge. Here another type of Prusik (Klemheist) is tied to the weighted rope and clipped on the rope tail with a third carabiner. When the rope is pulled up from here, the lower Prusik grabs the rope and raises the load. The top French Prusik is bumped against the first carabiner and is not grabbing the weighted rope yet.
When the first pull is finished, carefully lower enough rope backwards for the French Prusik to grab. Keep hold of the tail and slide the lower Klemheist Prusik back down the weighted rope towards the edge and repeat the process until you have raised the pack to within reach.
In place of Prusik slings, other devices can be used such as a Petzl Tibloc or other brands and device models that have the same effect of letting the rope move in only one direction. Pulleys can be added to the carabiners to allow the rope to move with less friction at each point of the zigzag.
.jpg)
Simple Z-drag (no Prusik safety or reset)

Full Z-drag
42 | BWA August 2018
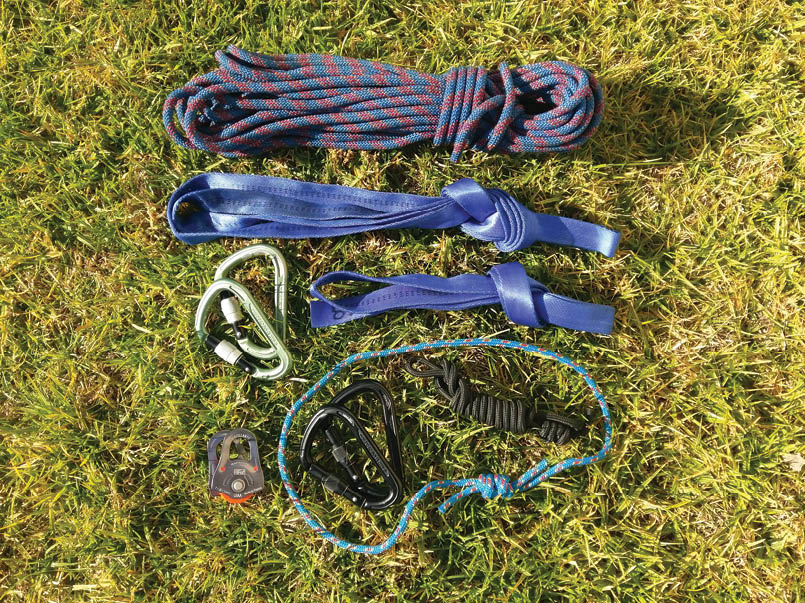


My personal handline kit consists of:
8 mm rated rope, 20 metres, 770 g
Mad Rock Hulk alloy locking carabiners, 3 or 4 at 79 g each
25 mm tube tape for slings, 2 and 3 metres, 220 g together
To make this into a haul kit I add:
Petzl Oscillante pulley x 2 at 44 g each
Short and medium Prusik slings, made from 6 mm rated rope, 75 g together
The weight of all this gear can start to add up quickly! My kit above will total 1.5 kg when put in a dry bag. This is not a problem if it makes your bushwalk journey easier and safer, with the kit shared around the group if needed. Additional tape slings can also be used to make improvised harnesses for people, but that’s another story.
Advanced and live loads!NOTE: If a haul system was used to support a live load (a human) then there are more considerations that must be included. These
would be ensuring the suitability of the anchor points chosen, using properly rated equipment, using locking carabiners loaded in their strongest direction and a belay or descending device. Such a system includes having backup features to minimise or stop any chance of a fall and shock load on the person and the system as well as having no single point of failure. Seek professional training before attempting any live load rope activity.
More information with pictures and explanations of knots See Oz Ultimate, Vdiff and Animated knots.
Handline/haul kitDaniel Mitchell
Daniel is a keen bushwalker of just a few years and is studying to be an outdoor guide. He is always looking for new information and became interested in ropes and abseiling when doing a guide canyoning course.


BWA August 2018 | 43